Launchers

Launcher is executable object, according to its type it can perform the required operations in the target system (start the browser, start RDP...), or after connecting via the Secret template and the created Connection it can start the application and log the user in using the stored credentials. Creating launchers differs by the type of the launcher and its use:
- Launcher type Agent works by simulating user actions directly in a specific application. According to its settings, the agent initially launches the application and then proceeds to perform the defined steps as if the user were performing all the actions himself. There is possibility to define one agent for more platforms (macOS, WIN or Linux).
- Launcher type Agent RDP is processed by directly opening the Remote desktop application, inserting the configured credentials and connecting the user to the configured remote desktop
- Launcher type Agent SSH is processed by directly using the SSH protocol to secure connection with the web servers
- This type od launcher allow user to authenticate 3 possible ways:
- by username and password
- by SSH key
- by SSH key and password
- Launcher type Guacamole is processed by directly using the guacamole configuration defined in the Integration part of ANT PAM settings. Guacamole allows the system to make a desktop PC, terminal server or any other server remotely accessible via the browser. This means that complex applications can be transferred to the browser of weaker PCs and used there.
- ANT ID supports following types of guacamole launchers:
- Guacamole TELNET
- Guacamole VNC
- Guacamole SSH
- Guacamole RDP
- Launcher type F5 - the launcher acts as a kind of proxy that provides authentication of the user's identity, obtains the token and then the credentials stored within the specific secret (identified via launcher mapping in the secret template level) Using the obtained credentials, it is then able to log the user into a system that does not directly support SSO (e.g. legacy system). There are two types of executions in the F5:
- Autodiscovery - based on defined specifics the F5 ensures the token verification within the trustworthy identity provider then search for the specifics secret in the personal folder of the user to get credentials and finally use obtained credential to login user into the target system
- Runnable - launcher is run directly from specific secret, so credentials are get immediately and F5 can directly use it to login in the target system. When F5 launcher is executed from secret's launcher, launcher page or connection, ANT ID generate random unique executionId and redirect user to defined endpoint with request parameter executionId={uuid}. F5 injector should skip user authentication for this endpoint because there is a timeout for credentials retrieval, instead I F5 should call this endpoint with execution id. Authentication and authorization has been already done in ANT PAM application
For Agent and Agent RDP/SSH type of launchers is neccessary to download and install Agent application on user's device.
For related privileges see Privileges and Permissions and for specific permissions for Launchers see Permission chapter.
Available actions for user with appropriate privileges: |
|
Create launcher |
|
Create new Launcher object - form for the launcher creation differs based on the type of tha launcher: |
|
Modify launcher |
|
Modification is divided into more parts:
|
|
Run launcher |
|
For execution of the launcher - Launcher will ask for values for variables and the perform the defined steps (in case of type Agent). |
|
Deactivate |
|
For active Launchers -> set the status to inactive |
|
Enable |
|
For inactive Launchers -> set the status to active |
|
Filter |
|
Filter active or inactive Launchers |
|
Search |
|
Opens the box to input the text to be searched |
|
Display detail |
[ click on the row ] |
Open drawer with the detail of the Launcher |


Available actions for user with appropriate privileges on the Permissions tab: |
|
Edit permissions |
[ option in context menu ] |
Open form to adjust permissions on the Launcher |
Available actions for user with appropriate privileges on the Logs tab: |
|
Open log in the full page |
[ option in context menu ] |
Open tab with brief overview of activities done with the object. By use of context menu [ |

Create Launcher type Agent |
|
1 |
Click on the tab Launchers in ANT PAM settings section. |
|
|
2 |
The list of existing Launchers will be displayed.
|
|
|
3 |
Press the CREATE button [ |
|
|
4 |
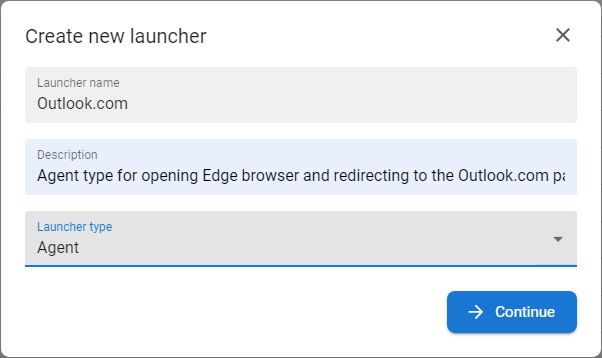
Insert the Name and Description of the launcher and select type Agent and press button CONTINUE |
|
|
5 |
The next step of creation form is displayed |
|
|
6 |
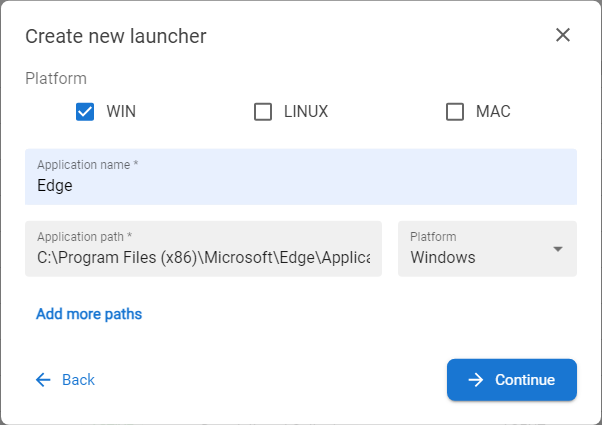
Select which platorm will use this agent launcher. Insert the name of the application and path to the executable file and platform. In case of more paths leading to the executable files, use button ADD MORE PATHS to display more input boxes.
|
|
|
7 |
Press button CONTINUE. |
|
|
8 |
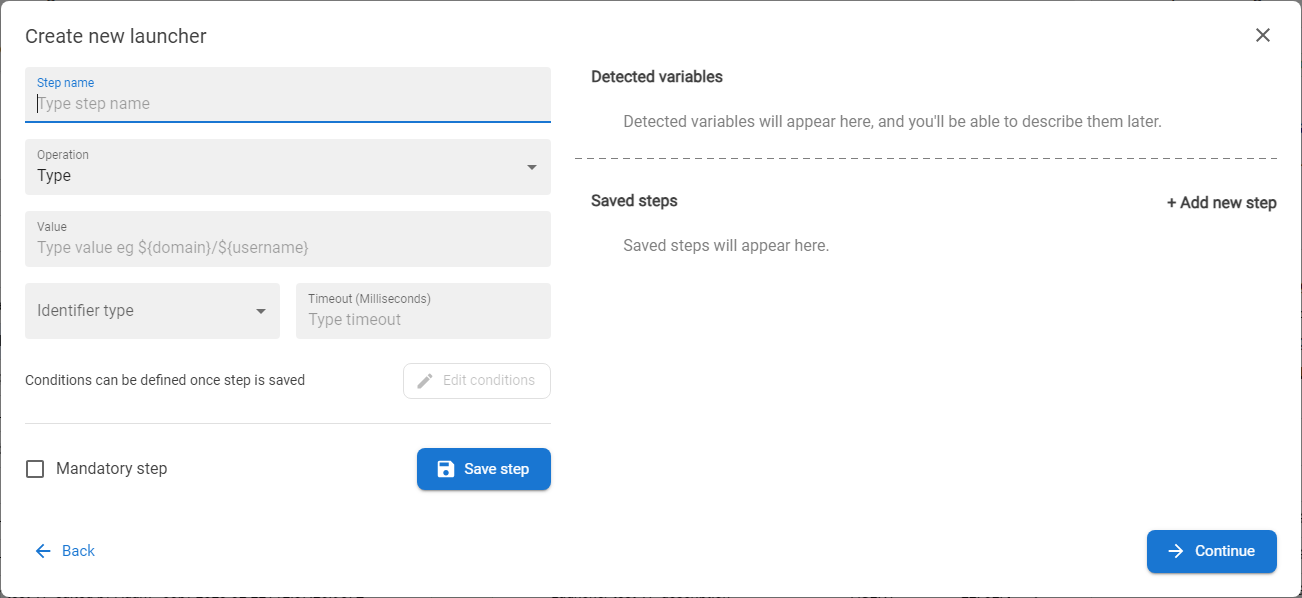
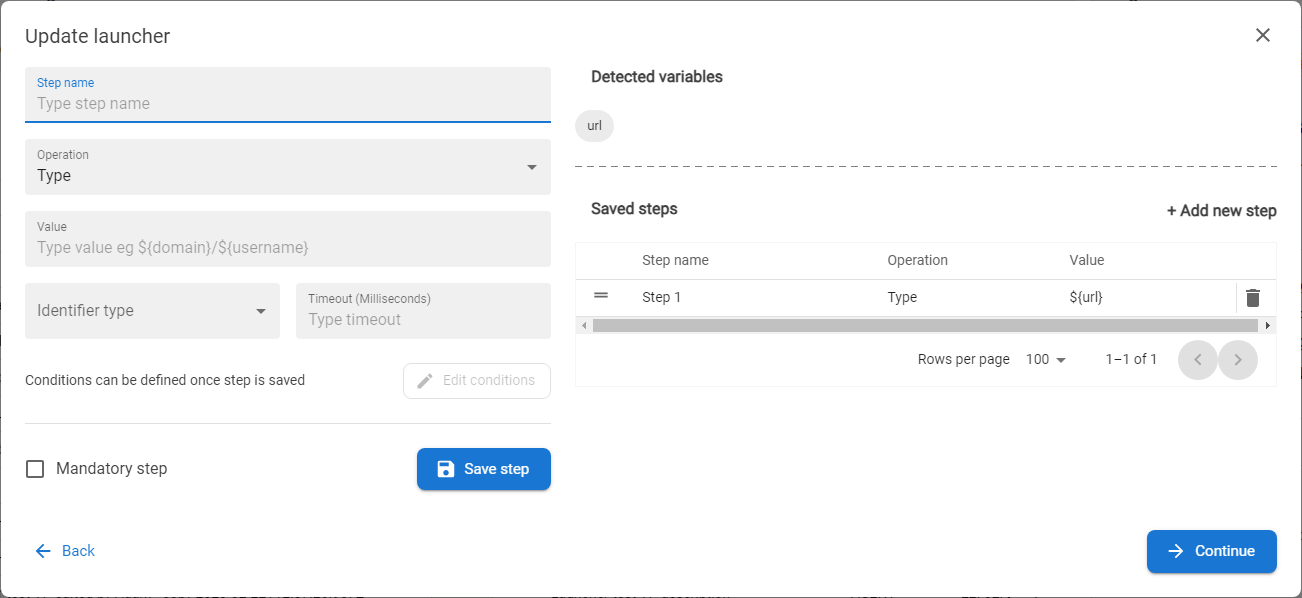
The step manager is displayed - on this step the user simulating activities are defined. |
|
|
9 |
Insert Step name and Operation type - type defines the activity done by agent - each type of operation has own set of parameters:
|
|
|
10 |
Press SAVE STEP button to save the step to the step manager (and to possibility to define some conditions on the step - see below)
|
|
|
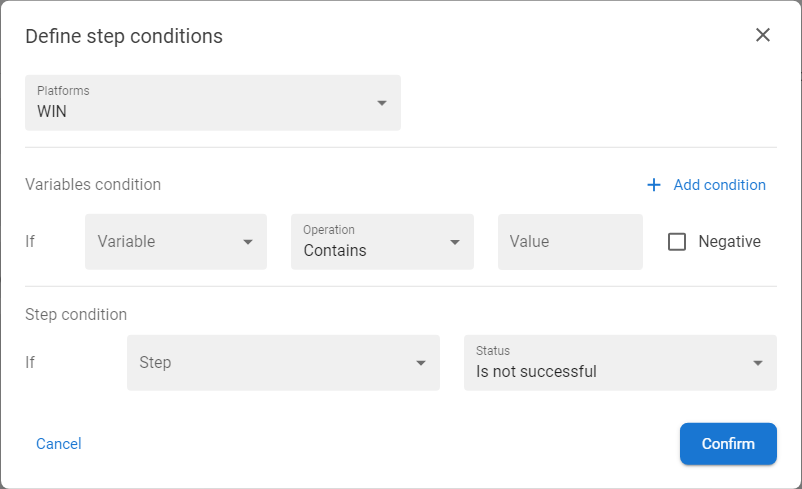
11 |
In case that the step needs some condition to be validated, select the step in the Saved steps section and click on the button EDIT CONDITIONS to open the configuration modal window. There is possibility to define conditions for the step for specific platform. The following types of conditions can be configured:
|
|
|
11 |
Define Timeout (milisec) - definition of the time period within which the agent attempts to perform this operation. |
|
|
12 |
Define if the step is Mandatory - if the step is mandatory and agent couldn't perform the operation within the defined time period the agent run ends. |
|
|
13 |
Press the SAVE STEP button. Save button also saves the conditions configured in the step manager.
|
|
|
14 |
The step is saved into the Saved steps overview on the right side of the form. If there is variable defined in any step, the variables are displayed (for information) in Detected variables section. Steps could be reorganized by drag&drop function [ The icon of the relevant platform is displayed [ If steps are finalized then press button CONTINUE. |
|
|
15 |
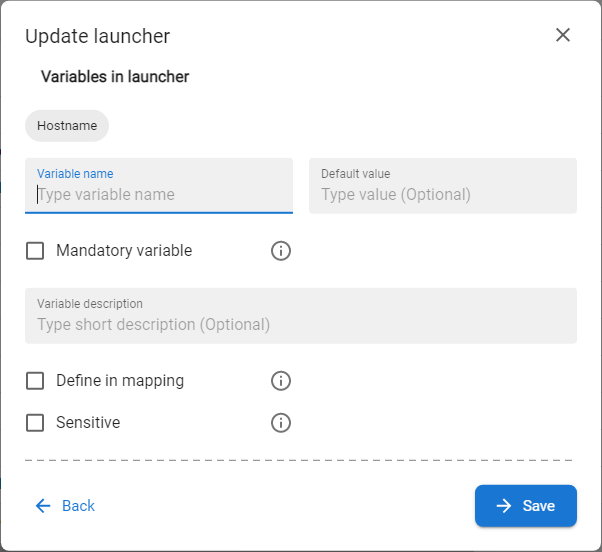
The form for definition of variables is displayed |
|
|
16 |
For every variable is possible to define following parameters:
|
|
|
17 |
Press button SAVE. |
|
|
18 |
The launcher will be saved and displayed in the list of Launcher. The status is set from DRAFT to ACTIVE. |


Create Launcher type Agent RDP |
|
1 |
Click on the tab Launchers in ANT PAM settings section. |
|
|
2 |
The list of existing Launchers will be displayed.
|
|
|
3 |
Press the CREATE button [ |
|
|
4 |
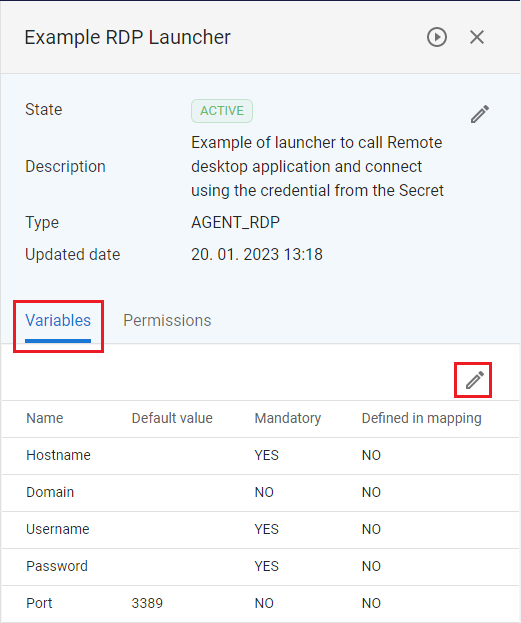
Insert the Name and Description of the launcher and select type Agent RDP and press the button SAVE. Laucher type Agent RDP has automatically created following variables:
|
|
|
5 |
The Launcher is created and displayed in the list of Lauchers. |

Create Launcher type Agent SSH |
|
1 |
Click on the tab Launchers in ANT PAM settings section. |
|
|
2 |
The list of existing Launchers will be displayed.
|
|
|
3 |
Press the CREATE button [ |
|
|
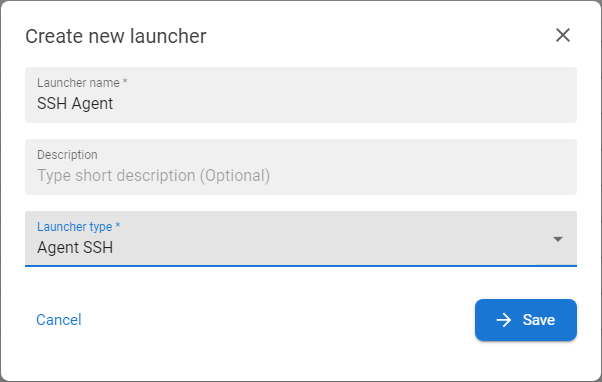
4 |
Insert the Name and Description of the launcher and select type Agent SSH and press the button SAVE. Laucher type Agent SSH has automatically created following variables:
|
|
|
5 |
The Launcher is created and displayed in the list of Lauchers. |
Create Launcher type F5 |
|
1 |
Click on the tab Launchers in ANT PAM settings section. |
|
|
2 |
The list of existing Launchers will be displayed.
|
|
|
3 |
Press the CREATE button [ |
|
|
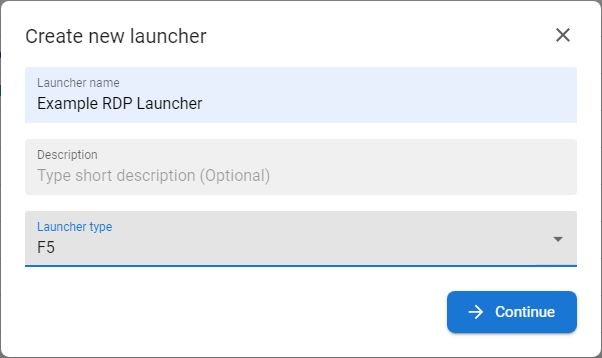
4 |
Insert the Name and Description of the launcher, select type F5 and press the CONTINUE button. |
|
|
5 |
F5 work on different principle as agent type of launchers. There are two possibilities how launcher can get the credentials to use them within the authentication in the target system.
|
|
|
6 |
Press the button CONTINUE. |
|
|
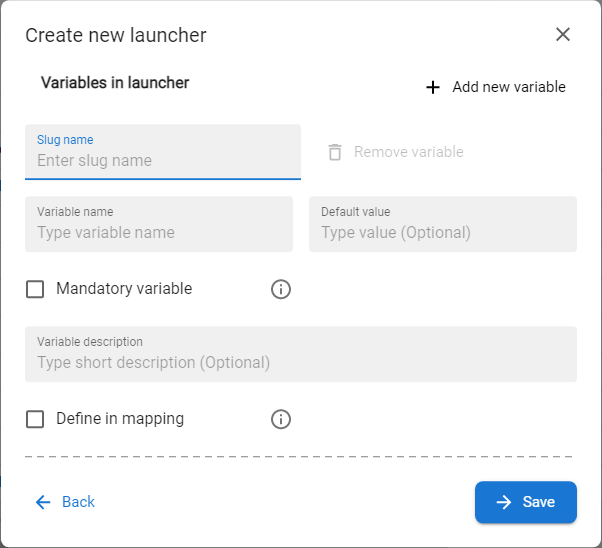
7 |
The page for configuration of Variables is displayed. For every variable is possible to define following parameters:
|
|
|
8 |
Press button SAVE and the Launcher will be saved and displayed in the list. |
|
|
|
By mapping this Launcher into the chosen Secret template (in the Launcher mapping function) the F5 looks after Secrets based on that Secret template to get the credentials neccessary for the proper execution. |

Create Launcher type Guacamole TELNET |
|
1 |
Click on the tab Launchers in ANT PAM settings section. |
|
|
2 |
The list of existing Launchers will be displayed.
|
|
|
3 |
Press the CREATE button [ |
|
|
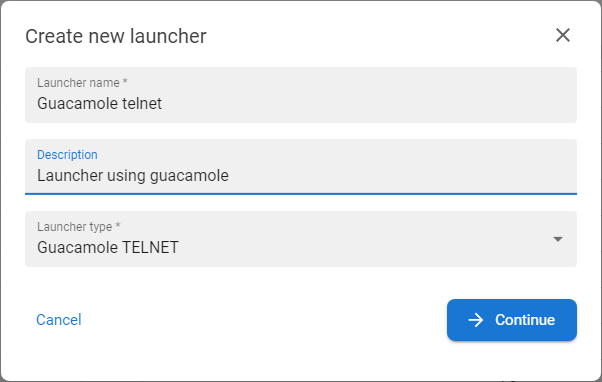
4 |
Insert the Name and optionally Description of the launcher and select type Guacamole TELNET and press the button CONTINUE. |
|
|
5 |
The next page with launch configuration is opened. |
|
|
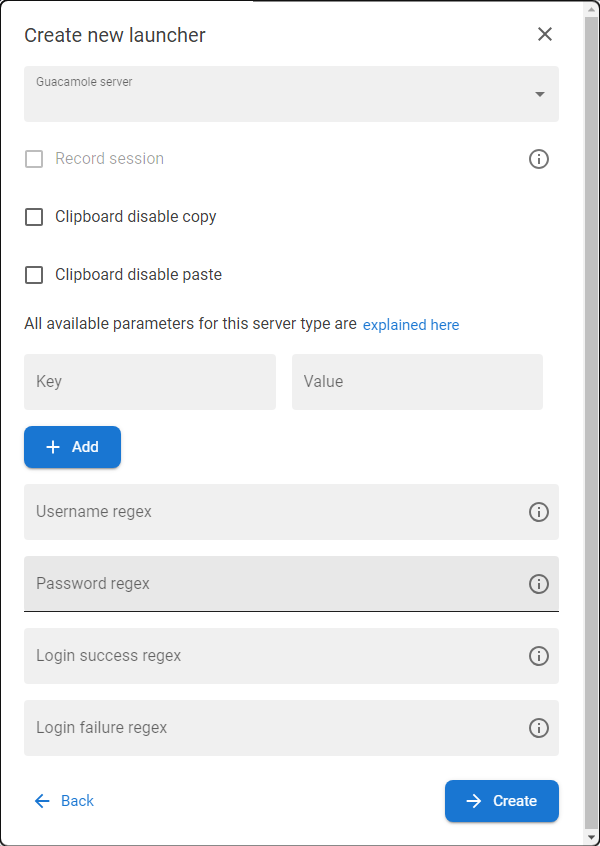
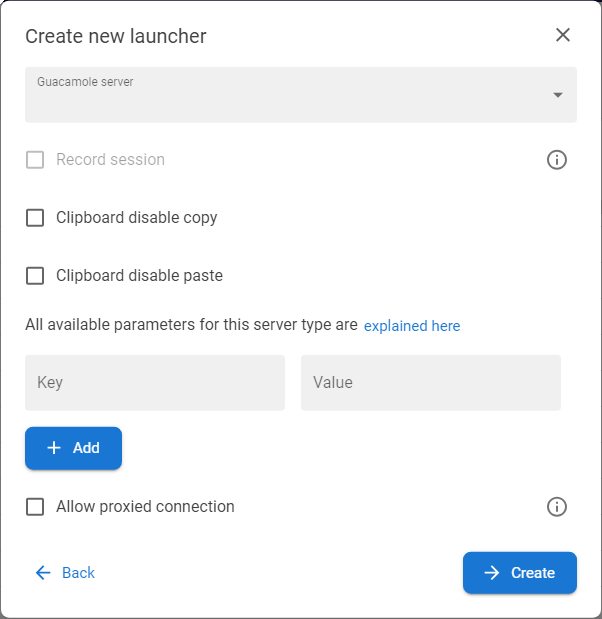
6 |
Select Gaucamole server - configured in the Integration section of ANT PAM settings - and configure following parameters:
|
Create Launcher type Guacamole VNC |
|
1 |
Click on the tab Launchers in ANT PAM settings section. |
|
|
2 |
The list of existing Launchers will be displayed.
|
|
|
3 |
Press the CREATE button [ |
|
|
4 |
Insert the Name and optionally Description of the launcher and select type Guacamole VNC and press the button CONTINUE. |
|
|
5 |
The next page with launch configuration is opened. |
|
|
6 |
Select Gaucamole server - configured in the Integration section of ANT PAM settings - and configure following parameters:
|

Create Launcher type Guacamole SSH |
|
1 |
Click on the tab Launchers in ANT PAM settings section. |
|
|
2 |
The list of existing Launchers will be displayed.
|
|
|
3 |
Press the CREATE button [ |
|
|
4 |
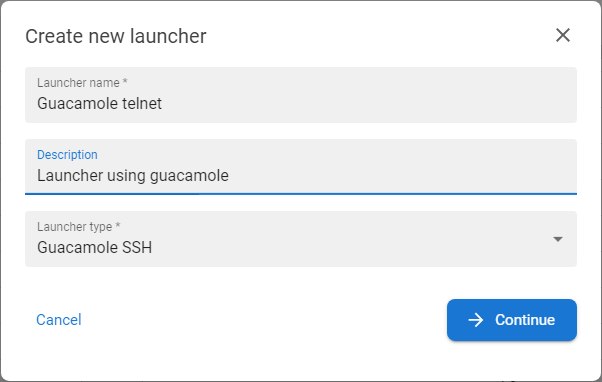
Insert the Name and optionally Description of the launcher and select type Guacamole SSH and press the button CONTINUE. |
|
|
5 |
The next page with launch configuration is opened. |
|
|
6 |
Select Gaucamole server - configured in the Integration section of ANT PAM settings - and configure following parameters:
|

Create Launcher type Guacamole RDP |
|
1 |
Click on the tab Launchers in ANT PAM settings section. |
|
|
2 |
The list of existing Launchers will be displayed.
|
|
|
3 |
Press the CREATE button [ |
|
|
4 |
Insert the Name and optionally Description of the launcher and select type Guacamole RDP and press the button CONTINUE. |
|
|
5 |
The next page with launch configuration is opened. |
|
|
6 |
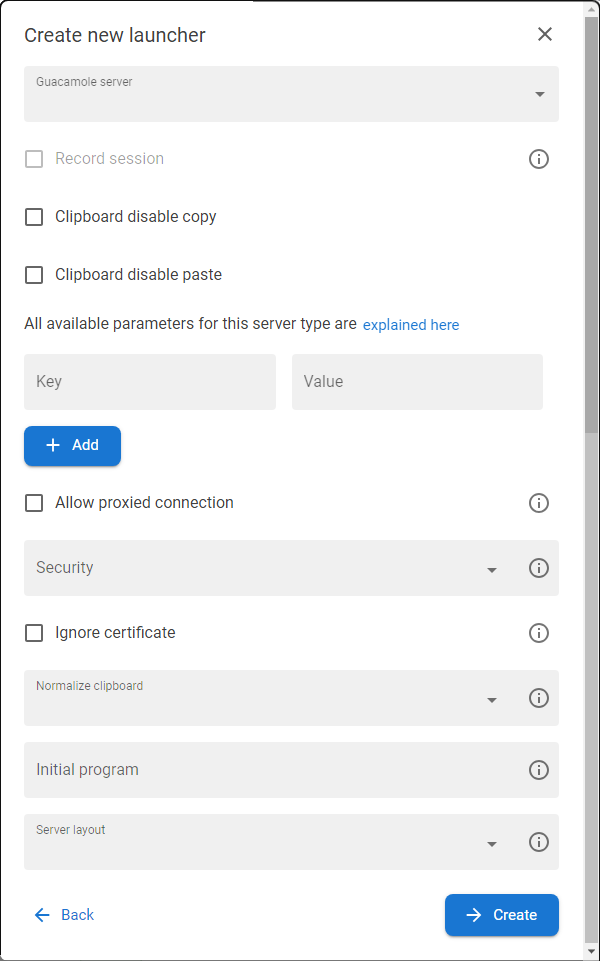
Select Gaucamole server - configured in the Integration section of ANT PAM settings - and configure following parameters:
|
|
|
7 |
When all configuration is done then press the CREATE button. The Launcher will be created and ready to use. |
|

Modify Launcher header |
|
1 |
Click on the tab Launchers in ANT PAM settings section. |
|
|
2 |
The list of existing Launchers will be displayed.
|
|
|
3 |
Mouse click on the row with desired launcher. |
|
|
4 |
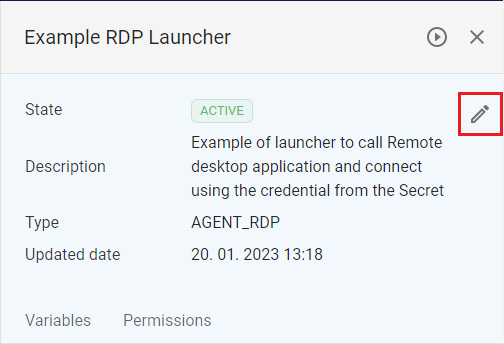
The drawer with the detail is displayed on the right side of the screen. |
|
|
5 |
Use button [ |
|
|
6 |
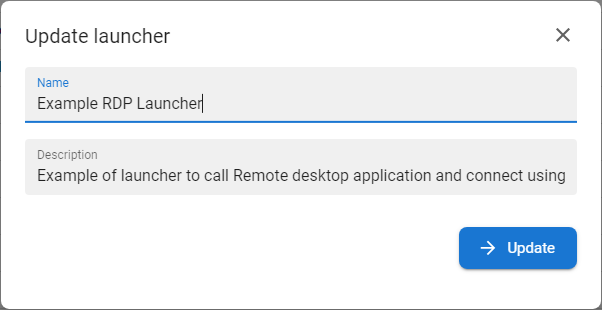
The modal window is diplayed.
|
|
|
7 |
Adjust Name or Description and press button UPDATE. |
|
|
8 |
The changes will be saved and modal window will be closed. |

Modify Launcher specifics |
|
1 |
Click on the tab Launchers in ANT PAM settings section. |
|
|
2 |
The list of existing Launchers will be displayed.
|
|
|
3 |
Mouse click on chosen launcher and the drawer with the detail of the launcher will appear. |
|
|
4 |
Go to the Specifics tab and press the MODIFY [ |
|
|
5 |
The modal window displayed varies according to the type of Launcher:
|


Modify Launcher variables |
|
1 |
Click on the tab Launchers in ANT PAM settings section. |
|
|
2 |
The list of existing Launchers will be displayed.
|
|
|
3 |
Mouse click on chosen launcher and the drawer with the detail of the launcher will appear. |
|
|
4 |
Go to the Variables tab and press the MODIFY [ |
|
|
5 |
The configuration page for variables is opened. For every variable is possible to define following parameters:
|