Secrets
Secrets are the main entities of the ANT PAM. The Secret is object that stores the required data. The scope of the stored data is defined at the Secret template level. A Secret can be shared with other users or groups of users. Permissions to access the Secret can be set in the desired range. Stored secrets are displayed in the folders structures. Every user has own personal folder.
For related privileges see Privileges and Permissions chapter.
Available actions in the list of Secrets: |
|
|
Create new Secret |
|
|
Display detail |
[ click on the row ] |
Open drawer with the detail of the Secret. |
|
|
Searches secret names and secret fields that are marked as searcheable. The results are displayed in the separate tab. |


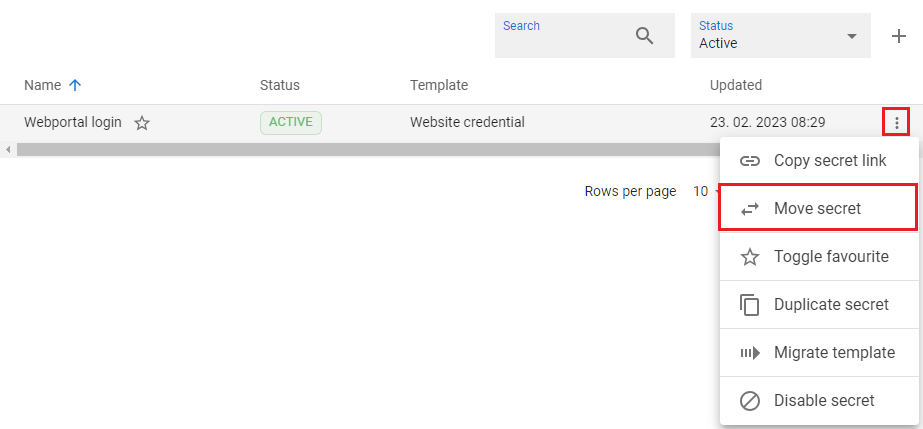
Available actions for Secrets in context menu: |
|
Copy secret link |
|
Get the direct link for the secret and save it to the clipboard |
|
|
Move secret from folder to folder |
|
|
Toggle favourite |
|
Mark Secret as favourite - secret will be available in the Favourites tab |
|
|
Duplication of chosen Secret - create new secret with the same name and timestamp of duplication |
|
|
|
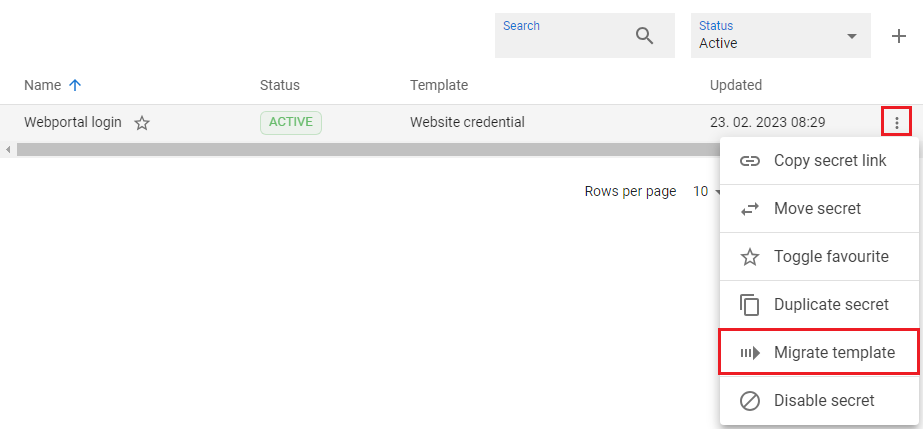
Migration of the Secret from current template to new template |
|
|
Disable secret |
|
For active Secrets -> set the status to inactive |
|
Enable secret |
|
For inactive Secrets -> set the status to active |


Available actions for Secrets on the detail of the Secret |
|
|
Modify Secret |
|
|
Copy secret field value to clipboard |
|
Get the value of the field and save it to the clipboard |
|
Display secret field history |
|
Display the history of the secret field |
|
View password value |
|
View the password (only for users with OWN or VIEW_PASSWORD permission) |
|
NATO phonetic transcription |
|
Display the value of the password in NATO phonetics transcription |


Available actions for Secrets on the Launchers tab: |
|
Run Launcher |
[ option in context menu ] |
Run the joined launcher and use stored credentials (based on the configuration of the launcher). |
|
[ option in context menu ] |
Create connection from the secret level. |
|
|
Open application |
[ option in context menu ] |
Only for F5 type of lauchers - link for the application binded via Launcher |
|
View launcher |
[ option in context menu ] |
Redirect user to Launchers section and display the detail of the launcher. Option is available for users with the privilege to see the Launchers section. |
Available actions for Secrets on the Sharing permissions tab: |
|
[ option in context menu ] |
Open form to adjust permissions on the secret. For better understanding see the example on the Permissions page. |
Available actions for Secrets on the Logs tab: |
|
Open log in the full page |
[ option in context menu ] |
Open tab with brief overview of activities done with the object. By use of context menu [ |

Create Secret |
|
1 |
Click on the tab Secrets to display the Secrets section. |
|
|
2 |
The personal root folder is opened and its content is displayed. |
|
|
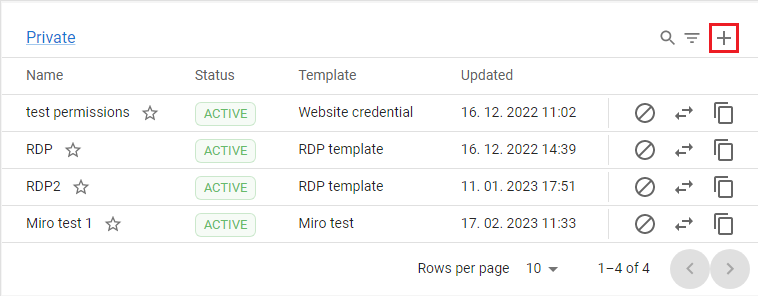
3 |
Choose the folder where new Secret should be created and placed and press the button CREATE [ |
|
|
4 |
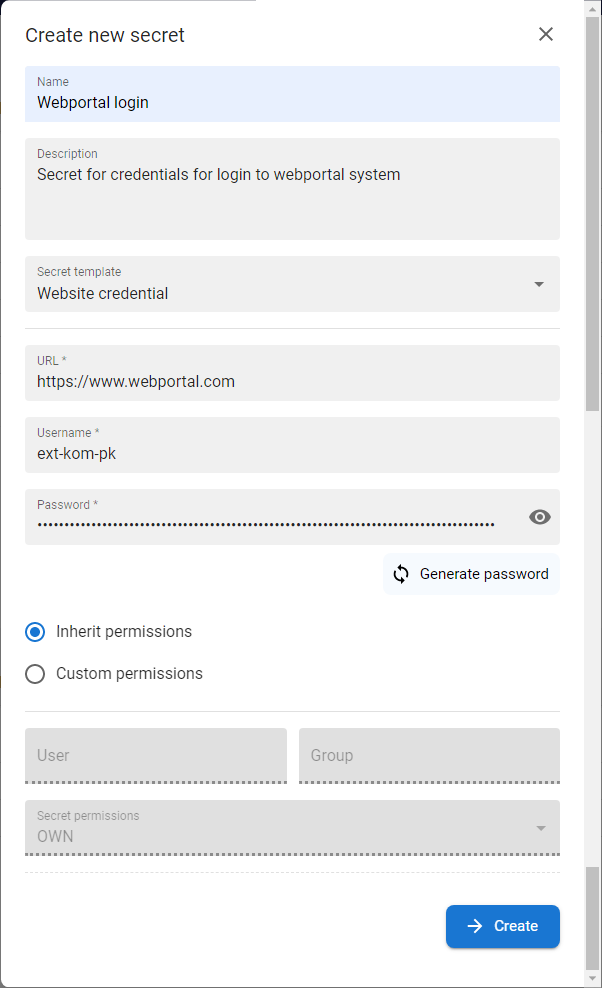
The modal window for the Secret creation will be displayed. |
|
|
5 |
Insert Name of the new secret, optionaly Description and choose Secret template.
|
|
|
6 |
The full list of Secret parameters will be displayed (based on configuration of Secret template) |
|
|
7 |
Fill the fields (at least mandatory fields)
|
|
|
8 |
Choose whether the permissions should be inherited from the parent folder or specified custom permission and press CREATE.
|
|
|
9 |
New secret is created and displayed in the folder. The detail of the new secret in the drawer will be opened. |
Modify Secret |
|
1 |
Find the Secret in the folders structure and click on the row. |
|
|
2 |
The drawer with the detail of the Secret will be opened. |
|
|
3 |
Press the EDIT button [ |
|
|
4 |
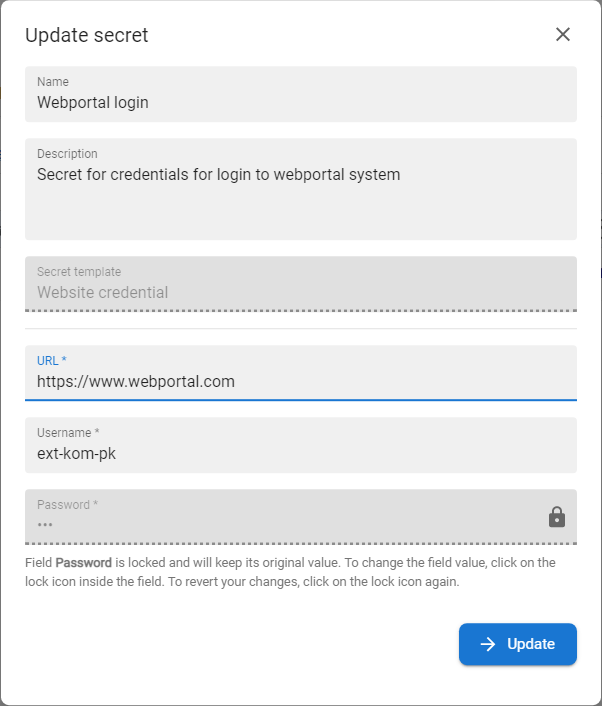
The Update secret modal will be opened and all parameters of the Secret will be available to adjust.
|
|
|
5 |
For the security reasons the Password value is not visible - it can be changed - click on the lock button [ |
|
|
6 |
Press the UPDATE button to save the changes. |


Move Secret |
|
1 |
Find the Secret in the folders structure, click on the context menu [ Rules for moving Secrets:
|
|
|
2 |
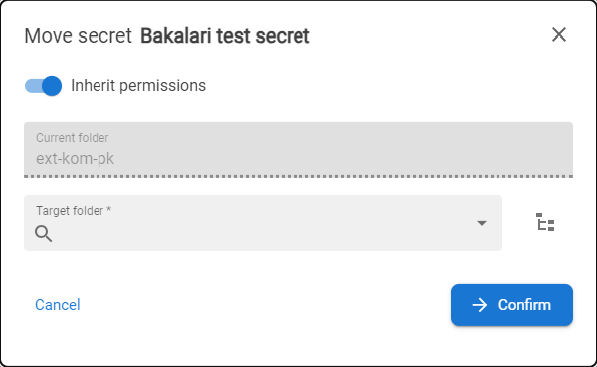
The modal window for the move Secret function is opened. |
|
|
3 |
Set whether the permissions for the Secret being moved should be inherited from the target folder, or whether the Secret should retain its current permissions. If existing permissions are to be retained, custom permissions will be saved.
Target folder can be selected in two ways:
|
|
|
4 |
Select the target folder from the folders list. |
|
|
5 |
Press the button CONFIRM. The moved folder will be opened and located within the target folder. |


Duplicate Secret |
|
1 |
Find the Secret in the folders structure, click on the context menu [ Rules for duplicating Secrets:
|
|
|
2 |
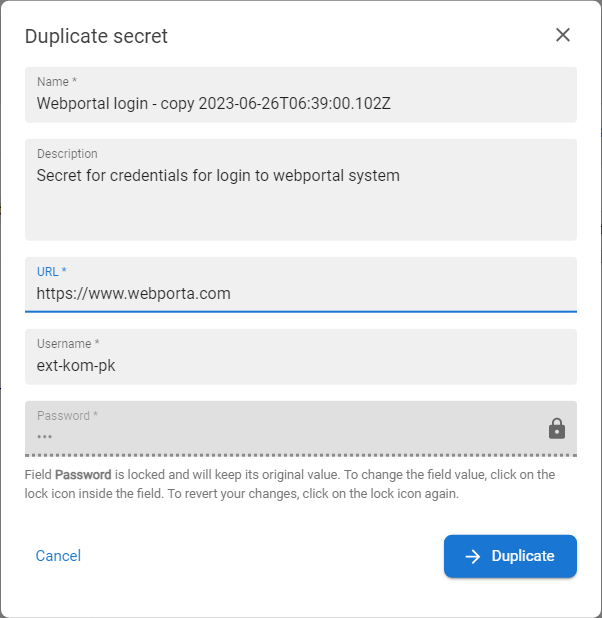
The modal window for the duplicating Secret function is opened. |
|
|
5 |
According to user's permissions relevant fields will be available to be ajdusted for the new Secret.
|
|
|
6 |
Adjust all available values and press DUPLICATE button |
|
|
7 |
New Secret will be created and its detail will be opened in the drawer. |


Migrate Secret |
|
1 |
Find the Secret in the folders structure, click on the context menu [ Rules for migrating Secrets:
|
|
|
2 |
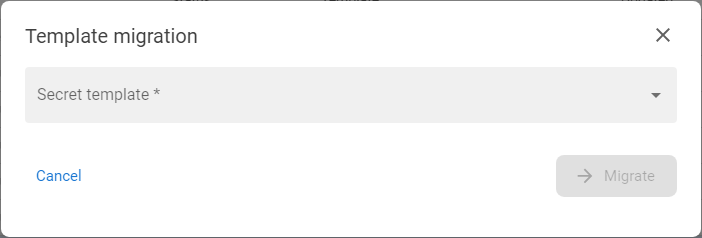
The modal window for the migrating Secret function is opened. |
|
|
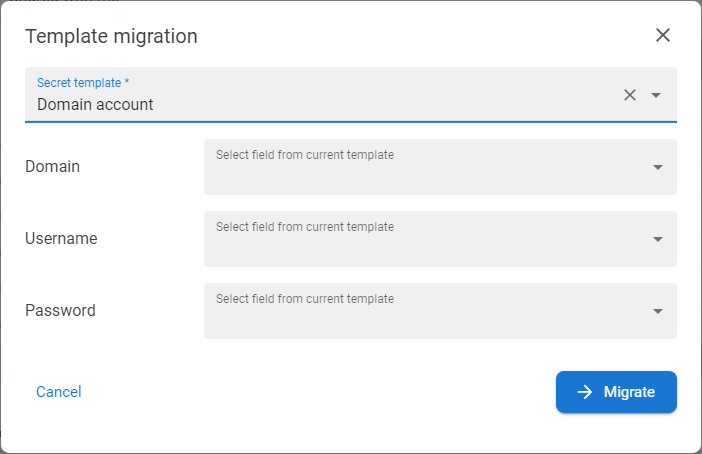
3 |
Select the new template and specify how to map fields from current template to fields from the new template. The mapping means that the values from fields from current template will be migrated to mapped fields in new template (including history). Also it is possible to set [Insert new value] option and fill the new value for the secret field. |
|
|
4 |
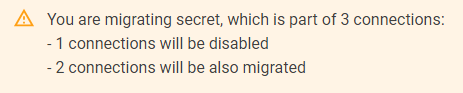
If the new template has a binding to the same Launcher as the current template, the new template will be transferred within the existing Connection. If the new Template doesn't have a binding to a Launcher or contains bindings to other Launchers, Connections created based on the current template will be disabled. |
|
|
5 |
When the form is completed then press the MIGRATE button and the secret and affected Connections will be migrated (od disabled). |
|
Create Connection |
|
1 |
Find the Secret in the folders structure and click on the row. |
|
|
2 |
The drawer with the detail of the Secret will be opened. |
|
|
3 |
Open the tab Launchers, select launcher which should be used for the connection and choose the CREATE CONNECTION option from context menu [ |
|
|
4 |
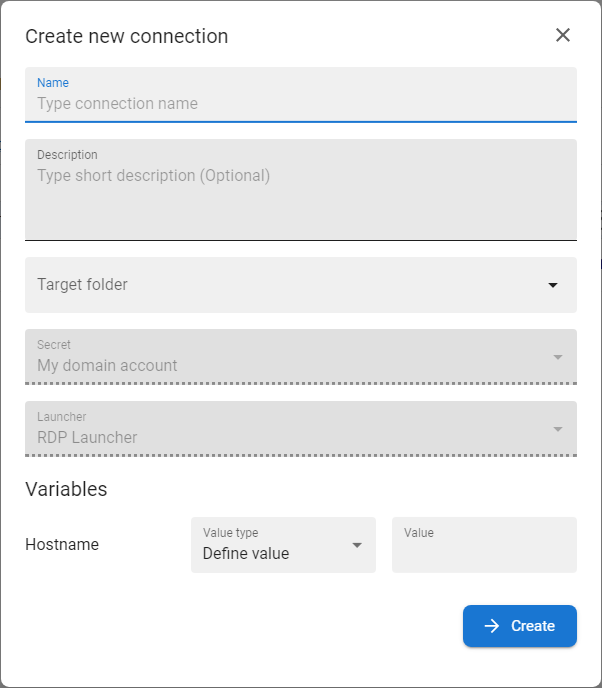
The form Create new connetion will be opened. |
|
|
5 |
Fill Name, optionally Description and select the connection folder where the new Connection should be created. |
|
|
6 |
Adjust variables needed for the correct run of the prefilled Launcher. Possible options are:
|
|
|
7 |
Press button CREATE to save the connection |
|
|
8 |
The user will be redirected to the Connections section and specific connection folder and newly created connection will be displayed. |
Edit permissions |
|
1 |
Find the Secret in the folders structure and click on the row. |
|
|
2 |
The drawer with the detail of the Secret will be opened. |
|
|
3 |
Open the tab Sharing permission to display permissions defined on the Secret. |
|
|
4 |
Press the EDIT button [ |
|
|
5 |
New tab with the defined set of permissions will be displayed. |
|
|
6 |
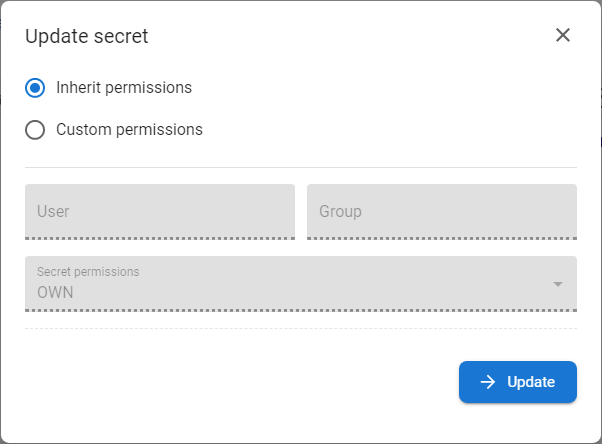
User can decide whether the permissions will be inherited - get from the folder, or custom - defined manually. |
|
|
7 |
In case that the Custom permissions should be configured switch the Custom permissions button. |
|
|
8 |
The part of the form will be activated and edited or new set of permissions could be defined. |
|
|
9 |
Search for User by username or for Group and define the permission for the Secret. List of permissions is available in Permissions chapter. |
|
|
10 |
Press the UPDATE button to save and apply new permissions. |

Search the ANT PAM |
|
1 |
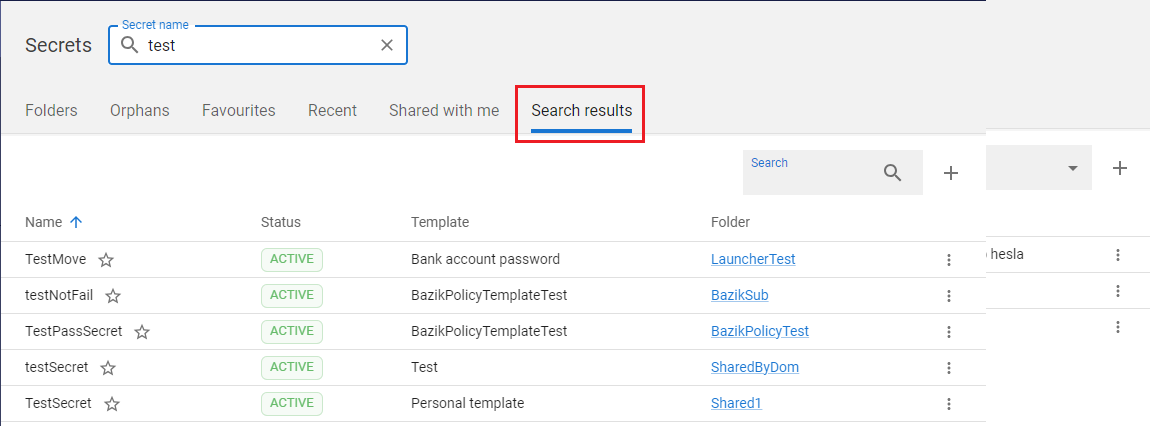
Open the Secrets section of ANT PAM and fill the text into the Search value field and press enter to start search. |
|
|
2 |
The results are displayed in separate tab Search results which will appear in the tabs section. The secrets can be viewed depends on the users permissions. |
|
|
3 |
After the reseting of the search field the Search results tab is closed. |