Invitation configuration
Onboarding or invitations are used for the manager or tenant operators to set up new users and send invitations to start the enrollment process. Invitation process is driven by invitation templates.
Two types of onboarding: |
|
Onboarding type |
Responsible |
Description |
Start of the process |
|
EXT |
Manager of the tenant |
Onboarding of new user - part of the onboarding process is to create a user in LDAP |
INVITE NEW USER button accessible from My Invitations page in Selfservice |
|
LDAP |
Operator |
Onboarding of users already existing in tenant's LDAP |
ADD NEW USER button accessible from Users list in Operational console |
Pro Tips:
- For external onboarding templates is necessary to consider the availability of password change feature - in specific cases onboarded user won't have password, so password change feature won't be usable for him. The solution is to create specific group without the permission to change the password and bind to the onboarding / invitation template.
- There is specific type of onboarding and enrollment - ON BEHALF - means that operator from tenant A can create user into tenant B - invitation and creation of the user depend on the relevant permissions and privileges.
Available actions for user with appropriate privileges: |
|
|
New approval operation configuration. |
|
|
|
Modify the template - edit basic attributes of the template. |
|
|
|
Create exact copy of used template. |
|
|
|
Delete invitation template - the template will be no more available for onboarding process. |
|
|
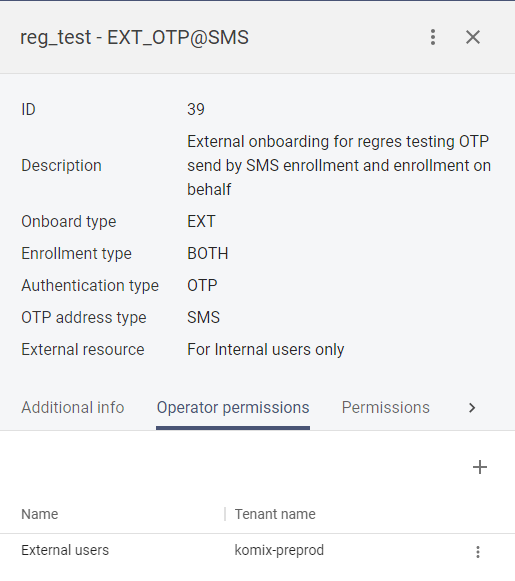
Display additional parameters |
[ click on the row ] |
Display additional parameters of the template - permissions, groups, LDAP attributes and so on. |
|
|
Add permissions for users from another tenant to manage onboarding to home tenant. |
|
|
|
Add permissions for users that can use this template to manage onboarding. |
|
|
|
Configure attributes from external resource that can be used to fill in within the onboarding process and which will be stored in the external resource within the onboarding process. |
|
|
|
Add external groups that will be assigned to the user within onboarding process. |
|
|
|
Add internal groups that will be assigned to the user within onboarding process. |


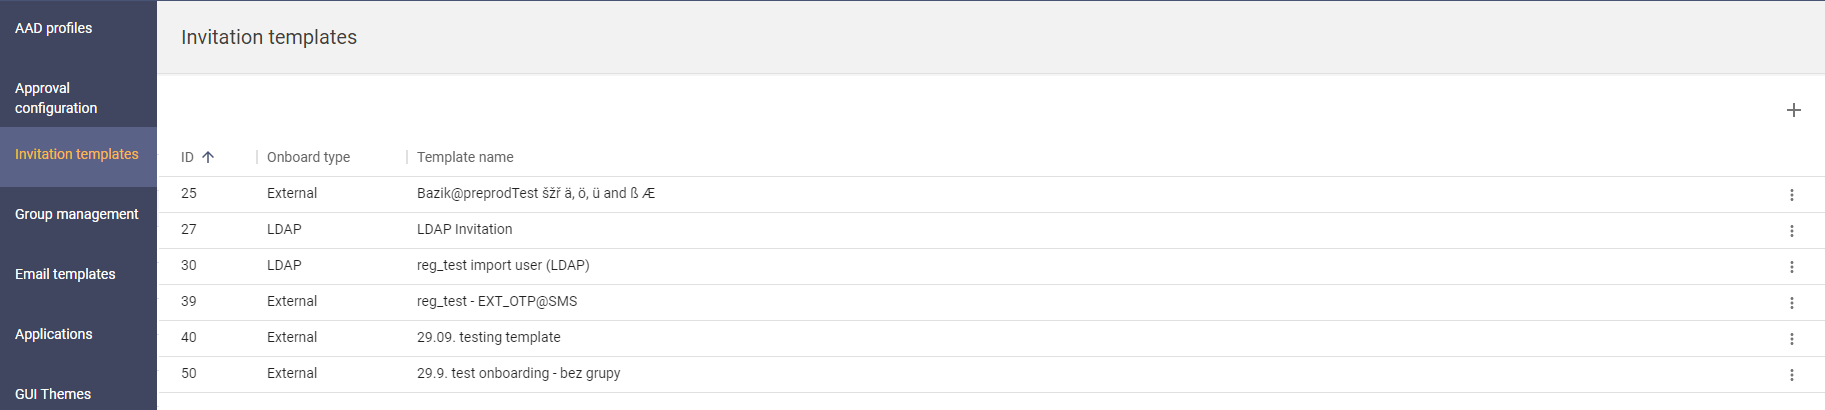
Create invitation template |
|
1 |
Open the TAC section and go to the Invitation templates. |
|
|
2 |
The list of invitation templates will be displayed. |
|
|
3 |
Press the ADD button [ |
|
|
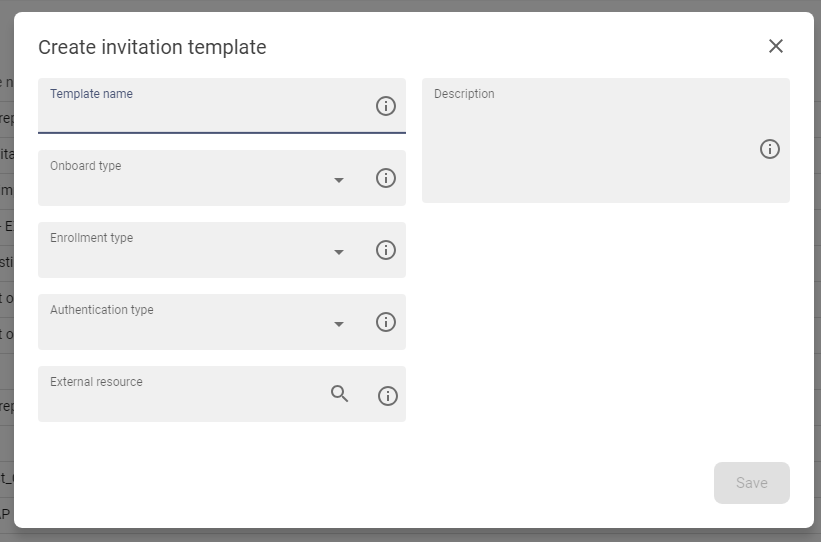
4 |
The form for invitation template parameters will be displayed - insert the Template name and Onboard type - for parameters and examples see bellow: |
|
|
5 |
Fill all relevant fields and press SAVE, the template will be save and displayed in the list of templates. |

Edit invitation template |
|
1 |
Open the TAC section and go to the Invitation templates. |
|
|
2 |
The list of invitation templates will be displayed. |
|
|
3 |
Press button Edit [ |
|
|
4 |
The modify form will be opened - make relevant changes and press the Save button to save changes., |


Duplicate invitation template |
|
1 |
Open the TAC section and go to the Invitation templates. |
|
|
2 |
The list of invitation templates will be displayed. |
|
|
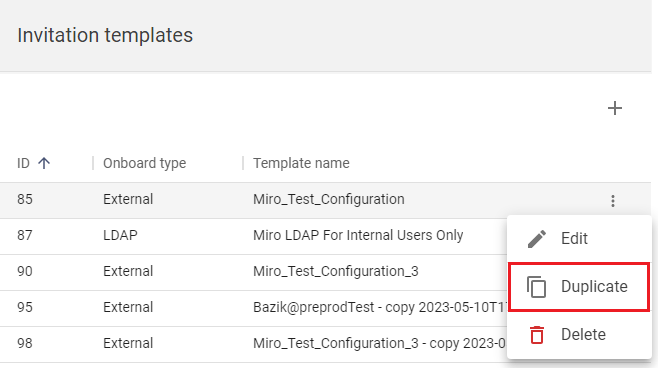
3 |
Press button Duplicate [ |
|
|
4 |
Template will be duplicated - the new record in the list of templates will be created with the name of the original template and the timestamp for better recognizing of new template |
Delete invitation template |
|
1 |
Open the TAC section and go to the Invitation templates. |
|
|
2 |
The list of invitation templates will be displayed. |
|
|
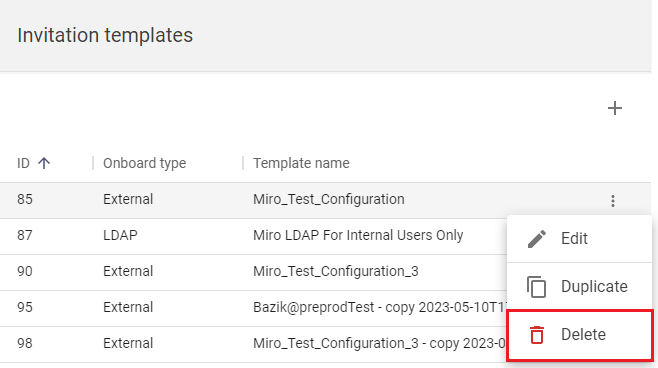
3 |
Press button Delete [ |
|
|
4 |
Confirm the confirmation dialog and press Delete button. The template will be removed from the list. |
Add Operator permission to use the template (part of enrollment on behalf feature) |
|
1 |
Open the TAC section and go to the Invitation templates. |
|
|
2 |
Click on the row of desired template to display the drawer with the detail of the template |
|
|
3 |
Go to the Operator permissions tab. |
|
|
4 |
The list of users or groups with the permission to use this template is displayed. |
|
|
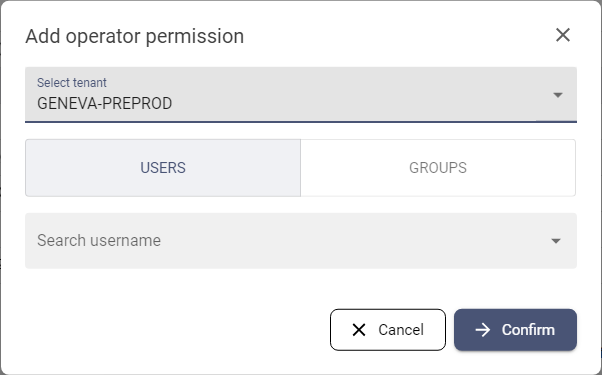
5 |
Press the Add [ |
|
|
6 |
Select which tenant is this template for - which operators or group of operators can use this template to enroll user on behalf - and select user of group of users to obtain the permission. |
|
|
7 |
Press Confirm button to save the permission. |
|
|
8 |
The newly granted permission will be displayed on the list of permissions. |
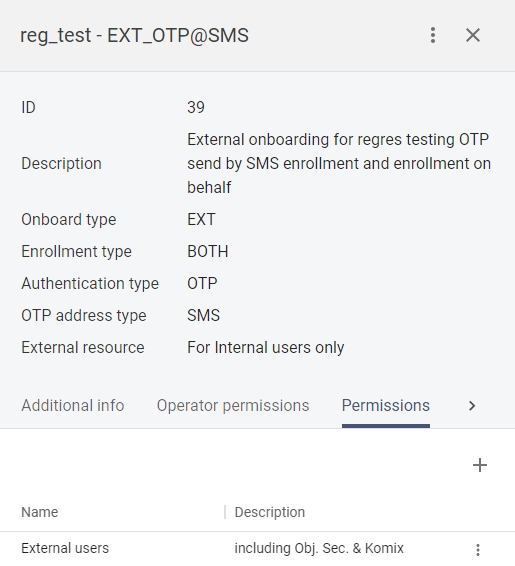
Add Permission to use the template |
|
1 |
Open the TAC section and go to the Invitation templates. |
|
|
2 |
Click on the row of desired template to display the drawer with the detail of the template |
|
|
3 |
Go to the Permissions tab. |
|
|
4 |
The list of users or groups with the permission to use this template is displayed. |
|
|
5 |
Press the Add [ |
|
|
6 |
Select which users or group of users can use this template to enroll external of internal users. |
|
|
7 |
Press Confirm button to save the permission. |
|
|
8 |
The newly granted permission will be displayed on the list of permissions. |

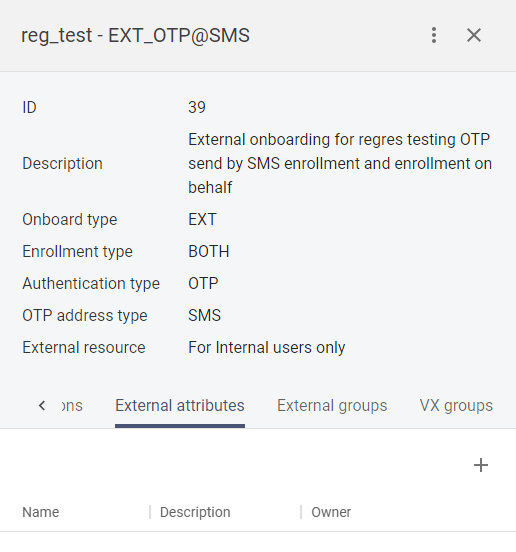
Add external attributes |
|
1 |
Open the TAC section and go to the Invitation templates. |
|
|
2 |
Click on the row of desired template to display the drawer with the detail of the template |
|
|
3 |
Go to the External attributes tab. |
|
|
4 |
The list of configured attributes is displayed |
|
|
5 |
Press the Add [ |
|
|
6 |
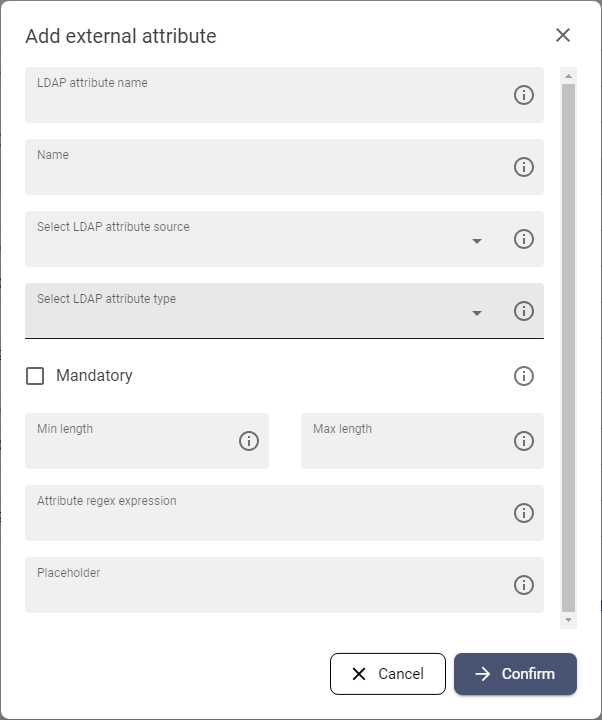
The form for configuration of LDAP attribute will be displayed:
|
|
|
7 |
Fill all neccessary parameters and press Confirm button to save the configuration. |
|
|
8 |
The list of attributes is displayed on the tab. |
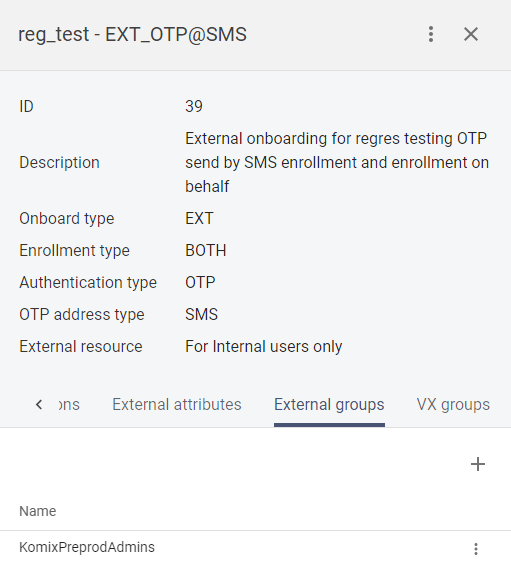
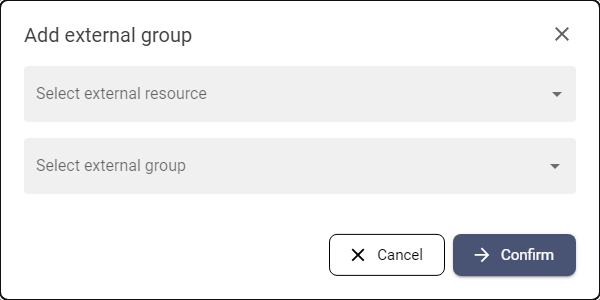
Add external groups |
|
1 |
Open the TAC section and go to the Invitation templates. |
|
|
2 |
Click on the row of desired template to display the drawer with the detail of the template |
|
|
3 |
Go to the External groups tab (use the arrow button [ |
|
|
4 |
The list of groups from external resource is displayed - this groups will be assigned to the user within onboarding process. |
|
|
5 |
Press the Add [ |
|
|
6 |
Select the external resource and group from this resource that should be assigned to the user within onboarding process. |
|
|
7 |
Press Confirm button to save the selection. |
|
|
8 |
The newly assigned groups will be displayed on the list of groups |

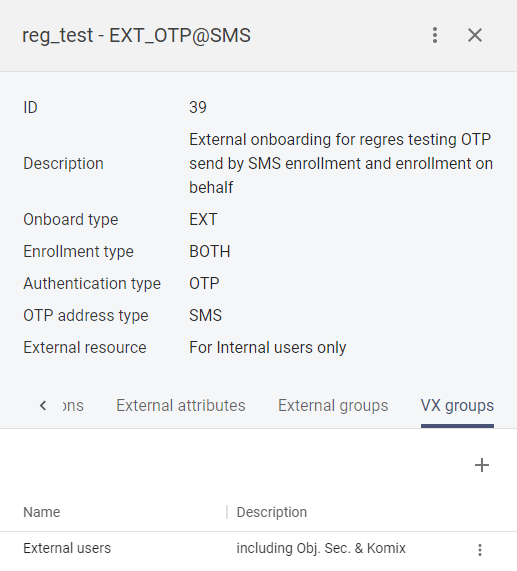
Add ANT ID groups |
|
1 |
Open the TAC section and go to the Invitation templates. |
|
|
2 |
Click on the row of desired template to display the drawer with the detail of the template |
|
|
3 |
Go to the ANT ID groups tab (use the arrow button [ |
|
|
4 |
The list of groups is displayed - this groups will be assigned to the user within onboarding process. |
|
|
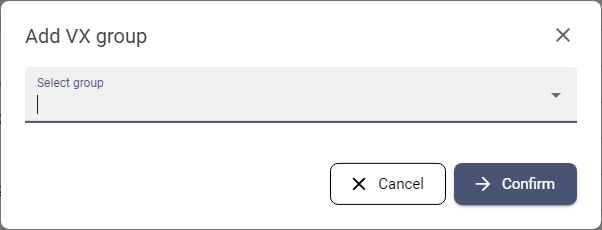
5 |
Press the Add [ |
|
|
6 |
Select the group that should be assigned to the user within onboarding process. |
|
|
7 |
Press Confirm button to save the selection. |
|
|
8 |
The newly assigned groups will be displayed on the list of groups |