Group management
Group management is part of the ANT ID configuration that covers the authorization for all the included features. In the group management user can manage ANT ID groups, roles and privileges to cover tenant's policy in the access management for all ANT ID features. In the Resource group mapping feature the external groups (groups from external resources like AAD or LDAP) can be binded to obtain roles from ANT ID groups.
Available actions for user with appropriate privileges: |
|
|
Create new group within ANT ID groups. |
|
|
|
Edit group detail. |
|
|
|
Delete group. |
|
|
|
Add mapping to ANT ID groups with external resource groups (AAD, LDAP...). When the user has group configured in the external resource this mapping ensures that user gets roles from mapped ANT ID group. Example and explanation: User has group Administrators defined in LDAP. Without mapping this LDAP group means nothing in the ANT ID. But if the mapping with ANT ID group Administrators is done, this user will automatically get all roles (and privileges) from ANT ID group Administrators without need to have ANT ID group assigned directly. |
|
|
|
Remove external group binding. |
|
|
|
Assign role (with privileges) to the group. |
|
|
|
Remove role from the group. |
|
|
|
Create new role. |
|
|
|
Edit role detail.. |
|
|
|
Delete role. |
|
|
|
Assign or update privileges in the role. |
|
|
|
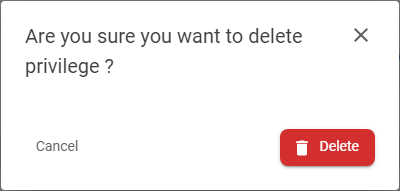
Remove privilege from the role. |
|
|
Search |
|
The search box allows user to find specific group or role by its name. |
|
Display detail |
[ click on the row ] |
Open the drawer with the detail of the group or role. |


List of all privileges with parameters is available here.
Add new group |
|
1 |
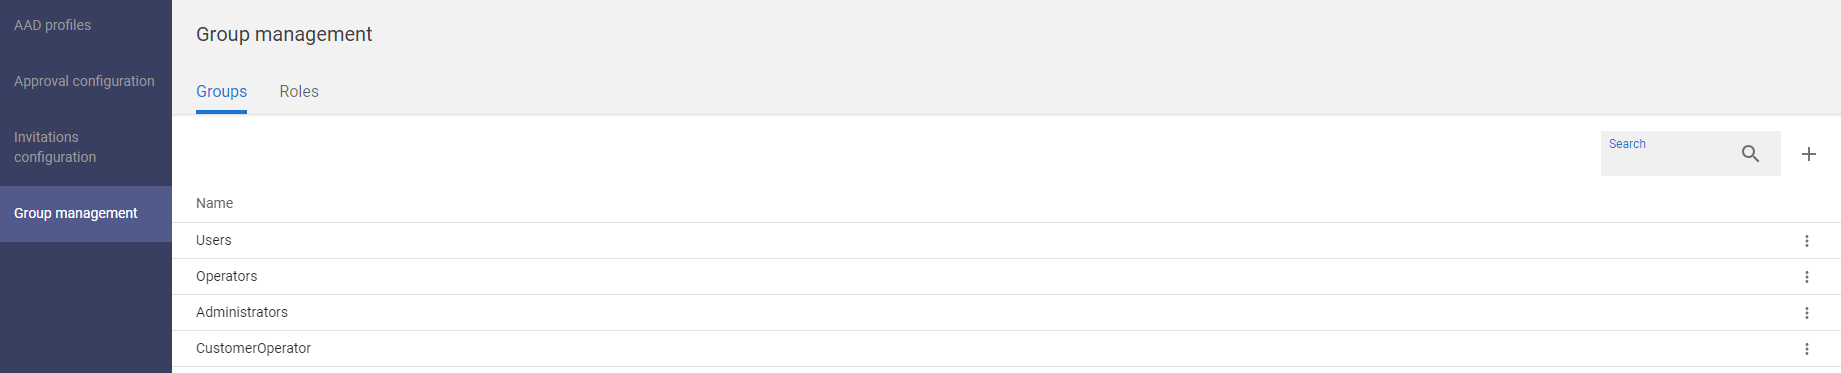
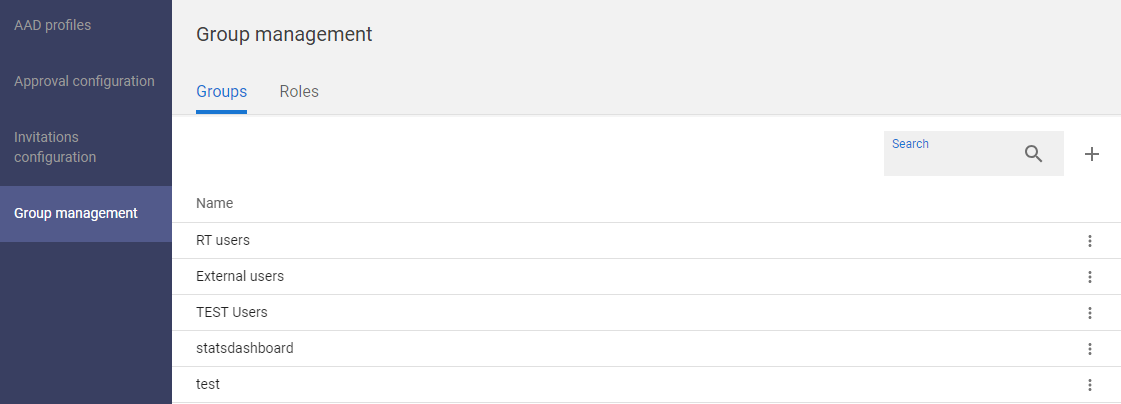
Open the IGA - Governance section and go to the Group management. |
|
|
2 |
The Groups tab will be displayed with the list of groups. |
|
|
3 |
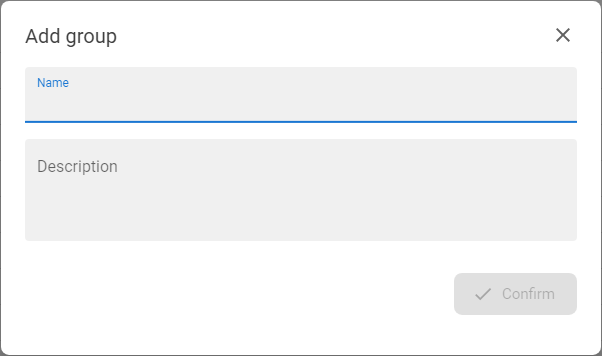
Press the ADD GROUP button [ |
|
|
4 |
Insert the Name and the optionally the Description of the group.
|
|
|
5 |
Press the CONFIRM button to save new ANT ID group. |
Edit group detail |
|
1 |
Open the IGA - Governance section and go to the Group management. |
|
|
2 |
The Groups tab will be displayed with the list of groups. |
|
|
3 |
Mouse click on the desired group to display the details of the group or directly use the EDIT GROUP DETAIL [ |
|
|
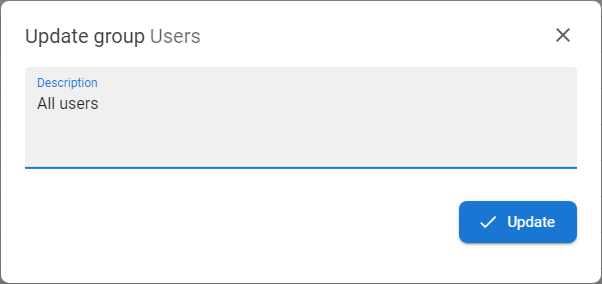
4 |
The edit window is opened. Only description is available to modify, the name cannot be changed. |
|
|
5 |
Do modifications and press UPDATE button to save changes. |

Delete group |
|
1 |
Open the IGA - Governance section and go to the Group management. |
|
|
2 |
The Groups tab will be displayed with the list of groups. |
|
|
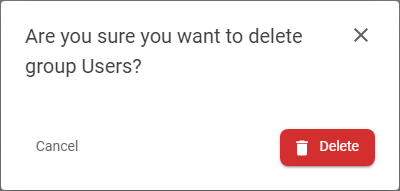
3 |
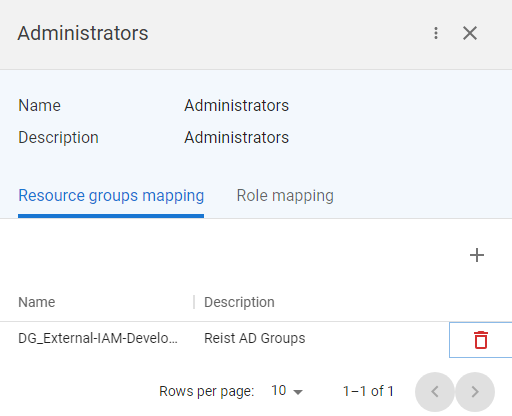
Mouse click on the desired group to display the details of the group or directly use the DELETE [ |
|
|
4 |
Confirm the delete by pressing the DELETE button and the group will be deleted. |
Add resource group mapping |
|
1 |
Open the IGA - Governance section and go to the Group management. |
|
|
2 |
The Groups tab will be displayed with the list of groups. |
|
|
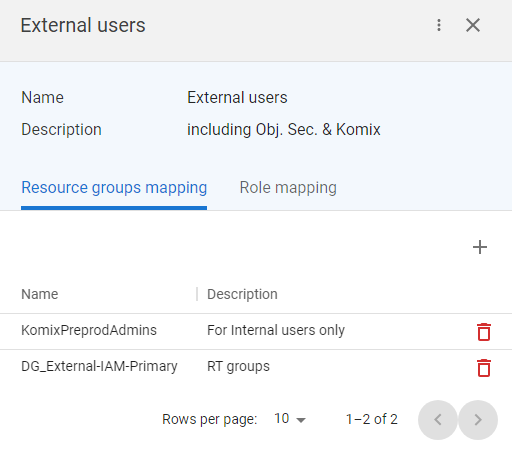
3 |
Mouse click on the desired group to display the details of the group. |
|
|
4 |
Go to Resource groups mapping tab and press the ADD button [ |
|
|
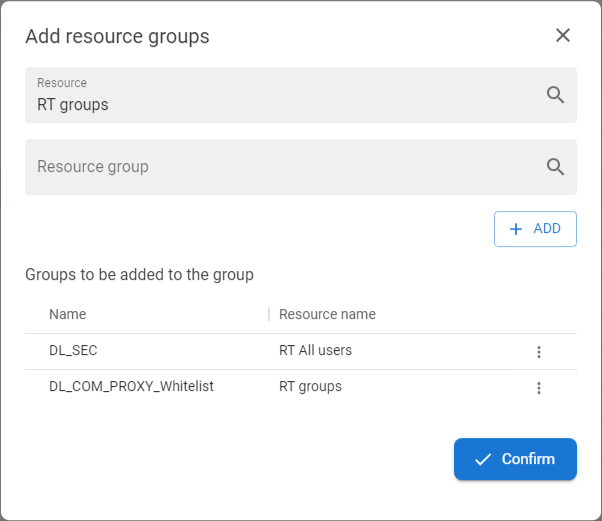
5 |
The Add resouces group modal is opened. |
|
|
6 |
Select the resource from the list and the resource group. |
|
|
7 |
Press the ADD button to move the selected group to the list of mapped groups.
|
|
|
8 |
Press the CONFIRM button to confirm the mapping.
|
Delete resource mapping |
|
1 |
Open the IGA - Governance section and go to the Group management. |
|
|
2 |
The Groups tab will be displayed with the list of groups. |
|
|
3 |
Mouse click on the desired group to display the details of the group and go to the Resources groups mapping tab. |
|
|
4 |
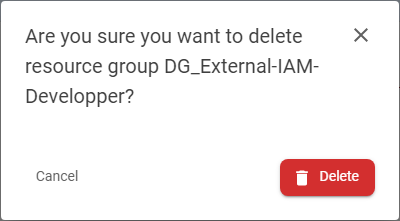
Click on the DELETE button [ |
|
|
5 |
Confirm the delete by pressing the DELETE button and the mapping will be deleted. |
|
Assign roles to the group |
|
1 |
Open the IGA - Governance section and go to the Group management. |
|
|
2 |
The Groups tab will be displayed with the list of groups. |
|
|
3 |
Mouse click on the desired group to display the details of the group. |
|
|
4 |
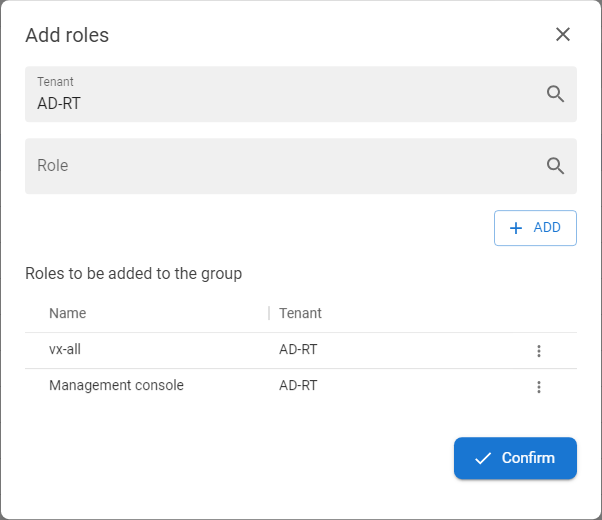
Go to Role mapping tab and press the ADD button [ |
|
|
5 |
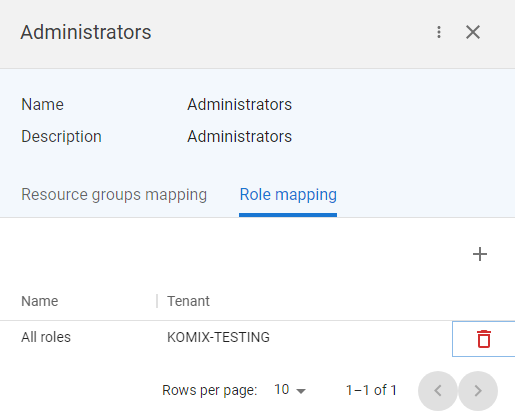
Choose tenant and select the role to be assigned.
|
|
|
6 |
Press button ADD to move selected roles to the list of mapped roles.
|
|
|
7 |
Press the CONFIRM button to confirm the role adding.. |
Remove roles from groups |
|
1 |
Open the IGA - Governance section and go to the Group management. |
|
|
2 |
The Groups tab will be displayed with the list of groups. |
|
|
3 |
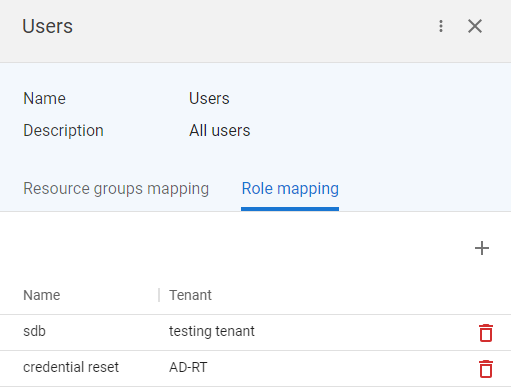
Mouse click on the desired group to display the details of the group and go to the Roles mapping tab. |
|
|
4 |
Click on the DELETE button [ |
|
|
5 |
Confirm the delete by pressing the DELETE button and the role will be removed from the group. |
|

Add new role |
|
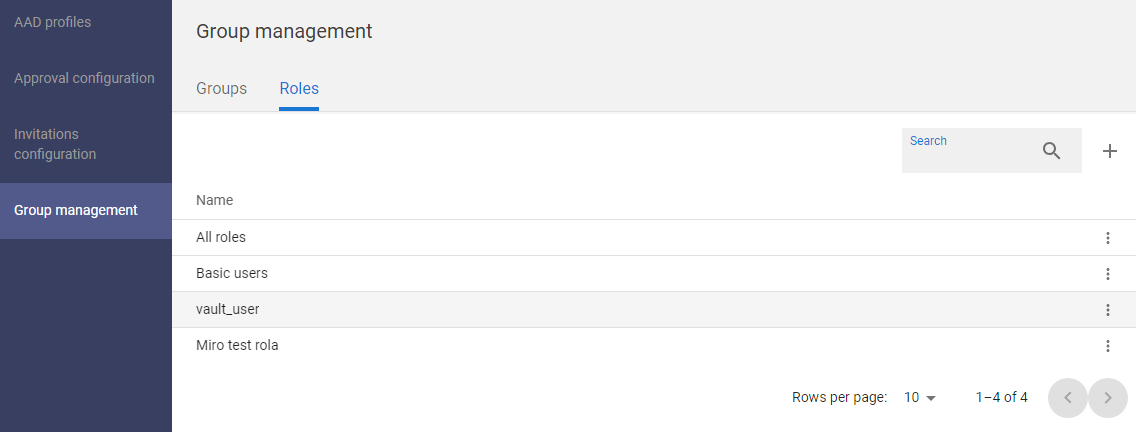
1 |
Open the IGA - Governance section and go to the Group management. |
|
|
2 |
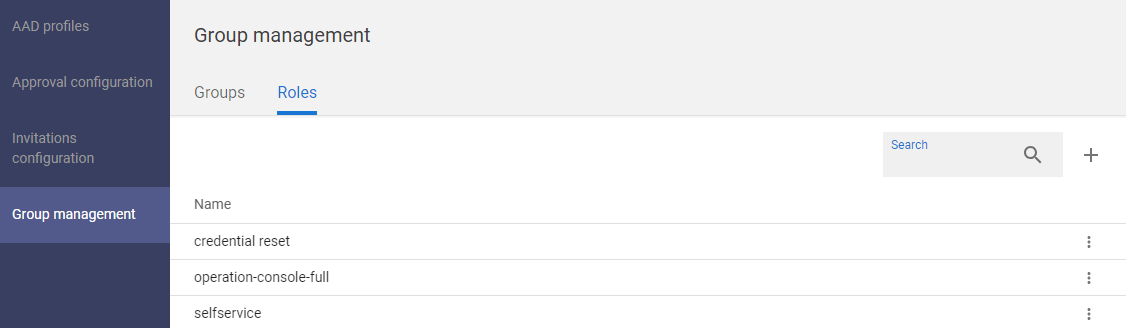
Go to the Roles tab to display roles section. |
|
|
3 |
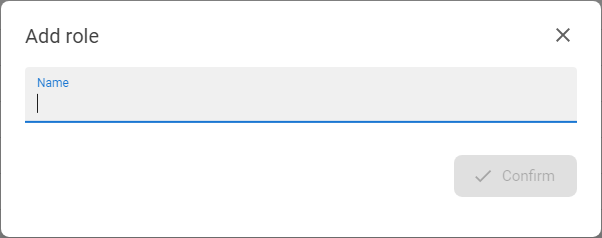
Press the ADD ROLE button [ |
|
|
4 |
Insert the Name and the optionally the Description of the role. |
|
|
5 |
Press the CONFIRM button to save new ANT ID role. |
Edit role detail |
|
1 |
Open the IGA - Governance section and go to the Group management. |
|
|
2 |
Go to the Roles tab to display roles section. |
|
|
3 |
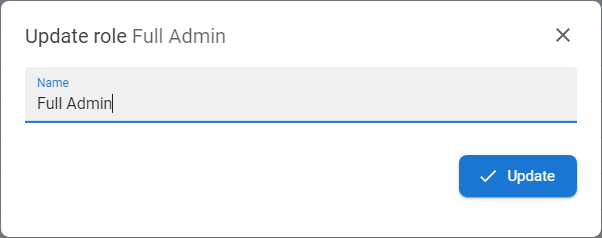
Mouse click on the desired role to display the details of the role or directly use the EDIT ROLE DETAIL [ |
|
|
4 |
The edit window is opened. Only name is available to modify. |
|
|
5 |
Do modifications and press UPDATE button to save changes. |
Delete role |
|
1 |
Open the IGA - Governance section and go to the Group management. |
|
|
2 |
The Groups tab will be displayed with the list of groups, go to the Roles tab. |
|
|
3 |
Mouse click on the desired role to display the details of the role directly use the DELETE [ |
|
|
4 |
Confirm the delete by pressing the DELETE button and the role will be deleted. |

Update privileges in role |
|
1 |
Open the IGA - Governance section and go to the Group management. |
|
|
2 |
Go to the Roles tab to display roles section. |
|
|
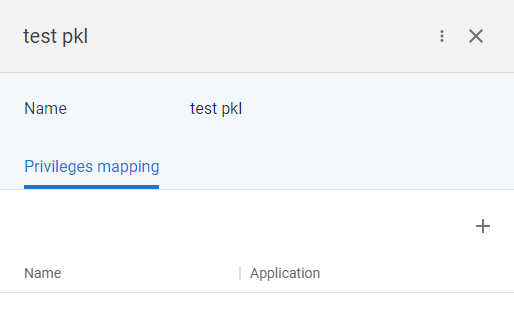
3 |
Mouse click on the desired role to display the details of the role. |
|
|
4 |
Go to the Privileges mapping tab and press ADD button [ |
|
|
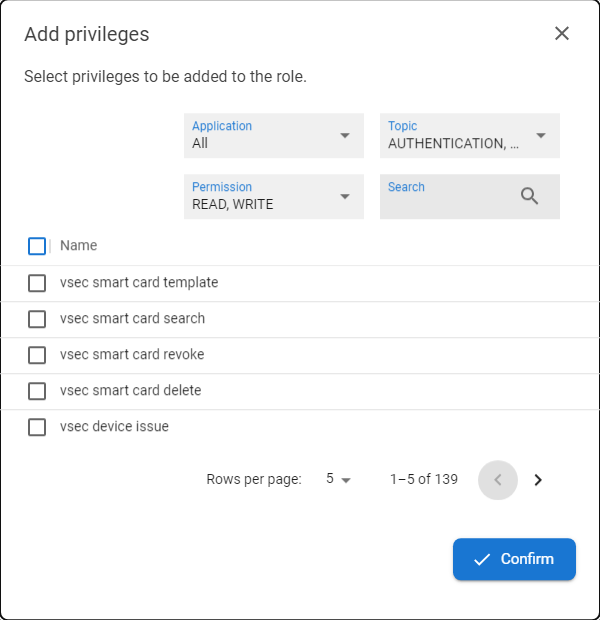
5 |
The modal window for privileges mapping is opened. The full list of available privileges is displayed in a paginated format to assign. Or you can search for privileges using the filter:
Or by Search the name of the privilege. The full list of privileges with the all attributes is here: Privileges in ANT ID |
|
|
6 |
Select privileges you want and press CONFIRM button to save the role mapping. |
Remove privileges from role |
|
1 |
Open the IGA - Governance section and go to the Group management. |
|
|
2 |
Go to the Roles tab to display roles section. |
|
|
3 |
Mouse click on the desired role to display the details of the role. |
|
|
4 |
Go to the Privileges mapping tab and press DELETE button [ |
|
|
5 |
Confirm the delete by pressing the DELETE button and the privilege will be immediatelly removed from the role. |
|