Display user details
Display user detail gives the operator the opportunity to display all necessary detail needed for the overall view of each user.
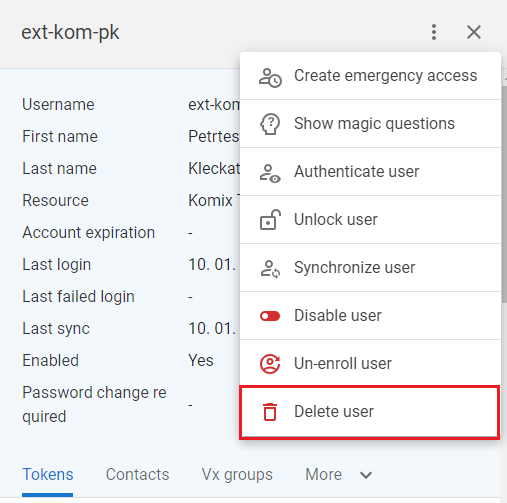
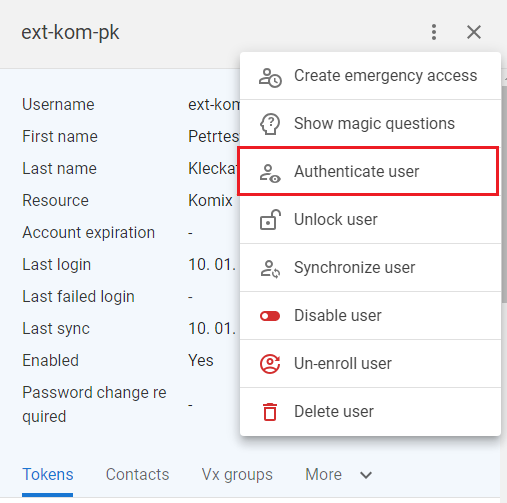
Available actions for user with appropriate privileges: |
|
|
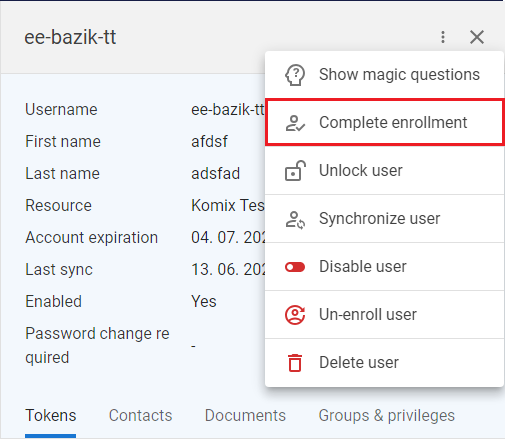
The feature available only for partially enrolled users - operator can use it and finish user's enrollemnt on behalf of user. Enrollment process done by operator on behalf of the user. In specific cases it is also possible for the operator from one tenant to enroll user to another tenant (in case that operator has all requested permissions and privileges defined on the target tenant side). |
|
|
|
Emergency access is a feature that allows an operator to generate a special one-time-password (OTP) for a user who has lost all means of authentication using a second factor - for example, a lost mobile phone. The OTP generated in this way has a limited validity and gives the user the possibility to log in to the application and perform the necessary actions to register new second factor authentication methods (for example, registration of new tokens on a new mobile phone, etc.). Emergency access code could be also used as an approval method. Note: The emergency code can be used to log in as a replacement for a standard OTP or as part of the approval process. Its validity is defined based on a template, BUT this code is deactivated when any of the following operations are performed:
|
|
|
|
Display user's magic questions and answers. |
|
|
|
The user authentication is a feature that is used by operators to verify the identity of the caller. It consists in sending a specifically generated OTP in a chosen way (for example to a mobile phone) and its return verification during communication with the caller. If the OTP communicated by the user is correct, it can be assumed that he is who he claims to be. |
|
|
|
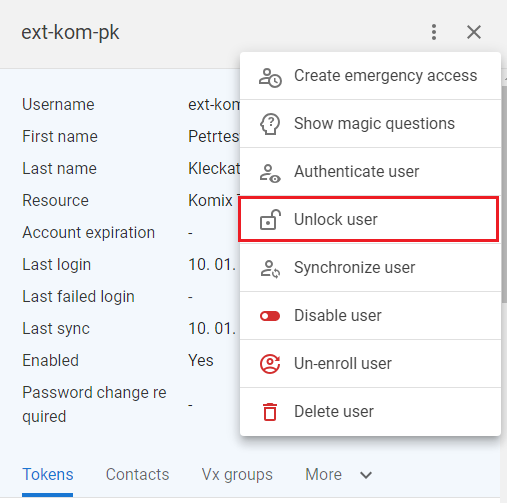
Feature used by operator to unlock user account locked in ANT ID - OTP auth application. User can lock due to multiple wrong password input. |
|
|
|
Feature used by operator to immediate update of user from external resource (first name, last name, status and etc). |
|
|
|
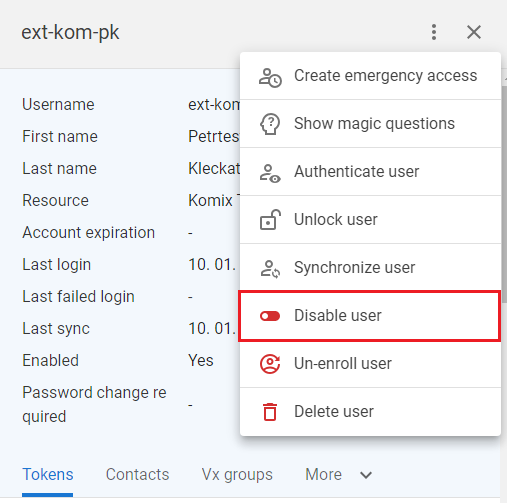
Feature used by operator to enable disabled user or to disable active user in AD. |
|
|
|
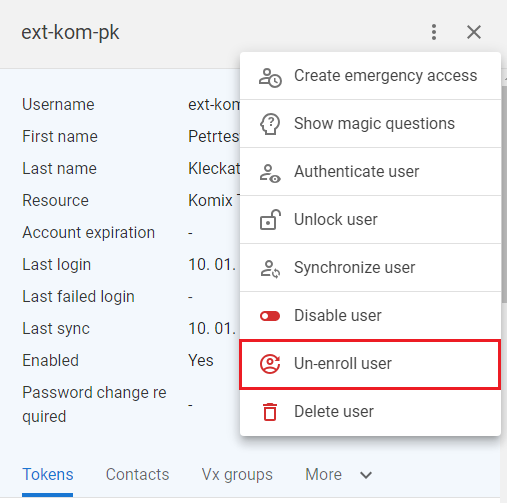
Re-enroll user feature allows operator to delete enrolled user from the system in case of any problems with users configurations. During the deletion all user data and enrolled tokens are removed from database and relevant storages. The user receives an email with information about the link to make a new enrollment. |
|
|
|
Permanently delete user from the system and from source LDAP as well - depending on admins configuration. |


Content of the user's detail |
|
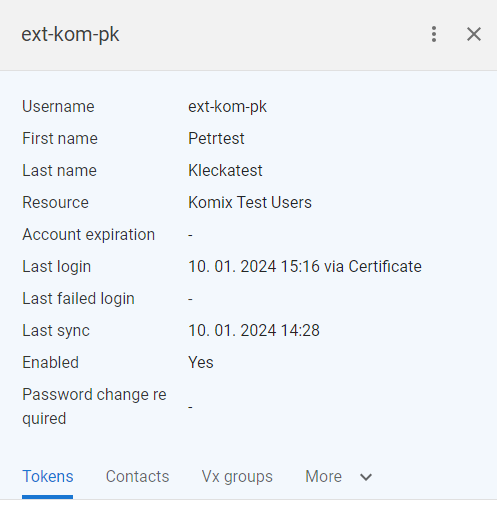
The drawer with the detail of the user consists of header with the details of the user:
|
|
|
The Tokens tab displays list of user's registered tokens - see more detail on User tokens page. |
|
|
The Contacts tab display a contact details of the user - see more details on Contacts page. |
|
|
The Documents tab displays a list of user's documents uploaded within the enrollment process or later via Account/Documents page - see more detail on User documents page. |
|
|
The Groups & privileges tab displays a list of groups that the user is member of - see more details on Groups & privilegs page. |
Complete enrollment - enrollment done by operator on behalf of user |
|
1 |
This function could be run as a part of invitation process (see above - Invite new user - Create new user) OR as s stand-alone feature from the Users list in Operational console - open the Users menu option in the Operational Console menu, switch to Partially enrolled users and use the Complete enrollment menu option from context menu |
|
|
2 |
The first step of enrollment on-behalf form will be displayed.
|
|
|
3 |
Fill all mandatory fields and press CONTINUE button. |
|
|
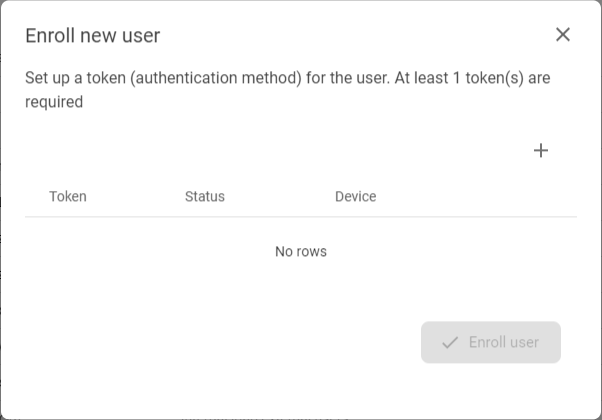
4 |
The second step of enrollment on-behalf form is displayed. This step contains enrollment of tokens. Press the ADD NEW TOKEN button [
|
|
|
5 |
Enroll required number of tokens and press ENROLL USER button. |
|
|
6 |
The user is enrolled in ANT ID and capable to log-in using the enrolled token. |


Create emergency access |
|
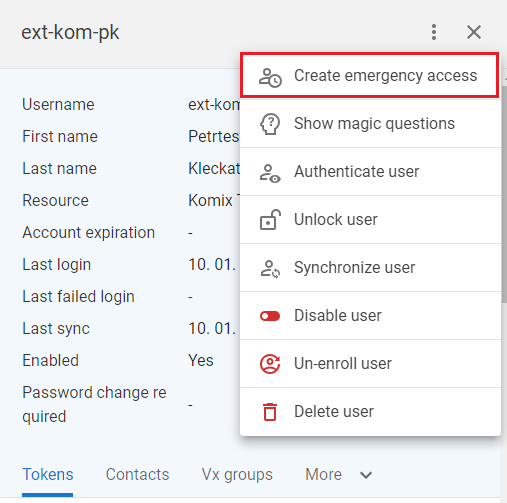
1 |
Press the CREATE EMERGENCY ACCESS button [ |
|
|
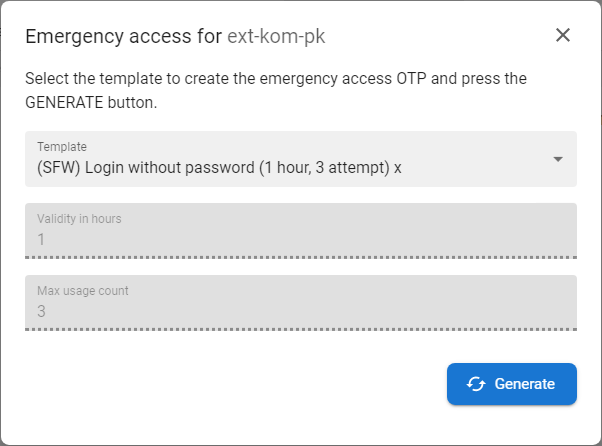
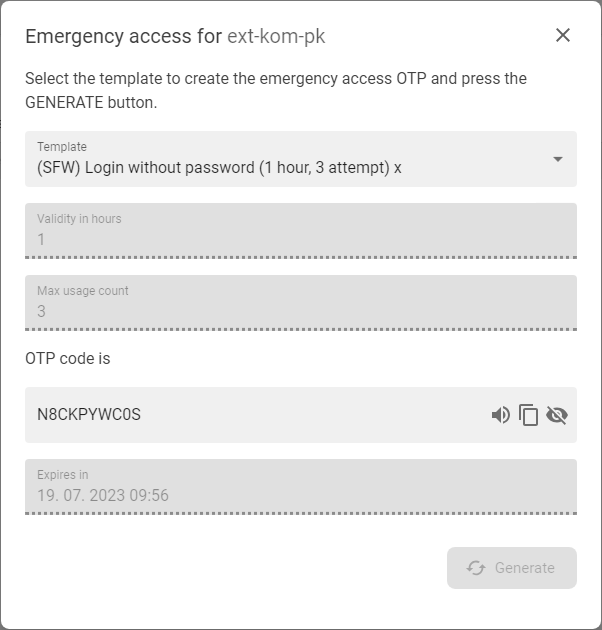
2 |
Select the template according to which emergency acces OTP is to be created and press the GENERATE button.
|
|
|
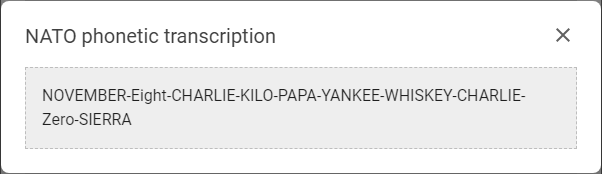
3 |
The OTP will be generated hidden, but by using the HIDE button [ The code can also be viewed in the NATO phonetic transcription for better communication with the users - use the button [
|
|
|
4 |
The COPY-TO-CLIPBOARD button [ |
|
|
5 |
If you want to generate the code again, you can replace the template and repeat the whole process again. |


Show Magic question and answers |
|
1 |
Press the SHOW MAGIC QUESTIONS button [ |
|
|
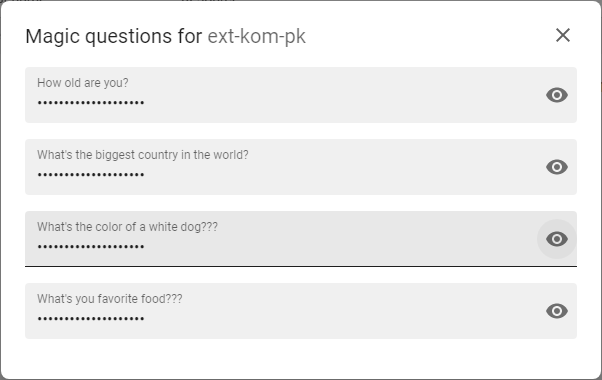
2 |
The list of user's magic questions and answers will be displayed. |
|
|
3 |
Press the EYE button [ |


Authenticate user |
|
1 |
Press the AUTHENTICATE USER button [ |
|
|
2 |
Select how the OTP is to be delivered and press NEXT button.
|
|
|
3 |
The system will send the OTP to the user in the selected way. |
|
|
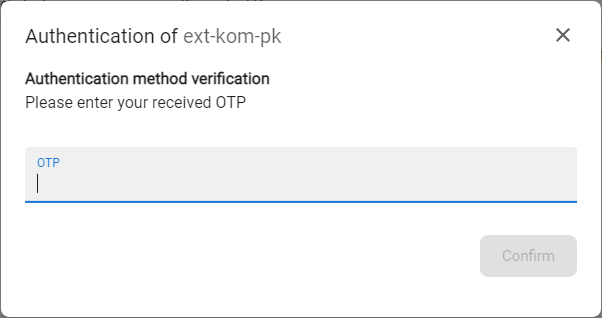
4 |
Request the delivered OTP from the user and fill it to the OTP field and press CONFIRM button |
|
|
5 |
If the entered OTP is correct the system will display a message about successful authentication of the user. |
|
|
5 |
If the entered otp is not correct, the user is not authenticated. Authentication could be done repeatedly. |
|


Unlock user |
|
1 |
Press the UNLOCK USER button [ |
|
|
2 |
The application will call ANT ID - OTP Auth app and reset the number of failed attempts so the user can try to log-in again. |
|

Synchonize user |
|
1 |
Press the SYNCHRONIZE USER button [ |
|
|
2 |
The application will call external AD database, fetch user data (name, surname, status...) and refresh stored data. |
|


Enable / Disable user |
|
1 |
Press the ENABLE USER button [
|
|
|
2a |
For disable user: the user will be disabled in resource AD - the Enabled status will be set to NO.
|
|
|
2b |
For enable user: the user will be disabled in resource AD - the Enabled status will be set to YES.
|
|
Un-enroll user |
|
1 |
Press the UN-ENROLL USER button [
|
|
|
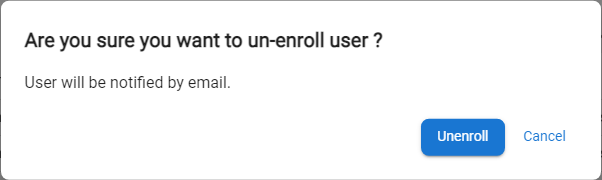
2 |
Confirm the modal confirmation modal window by pressing UNENROLL button.
|
|
|
3 |
List of users will be displayed where the un-enrolled user won't be displayed. |

Delete user |
|
1 |
Press the DELETE USER button [
|
|
|
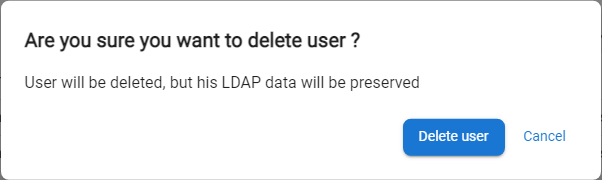
2 |
Confirm the modal confirmation modal window by pressing DELETE USER button.
|
|
|
3 |
List of users will be displayed where the removed user won't be displayed. |