Example of configuration
The following example can be used by a user with the admin role as a template for creating a basic Password policy, a Secret template for saving credentials in Secret, Launcher, Secret and finaly Connection for releasing remote desktop with credentials from the Secret.
The example assumes that there is already some remote desktop and there are login credentials - these credentials will be stored as part of the secrete creation - see point 5.
Configuration process:
- Create Password policy
- Create Launcher (RDP agent)
- Create Secret template
- Map launcher on the Secret template
- Create Secret
- Create Connection
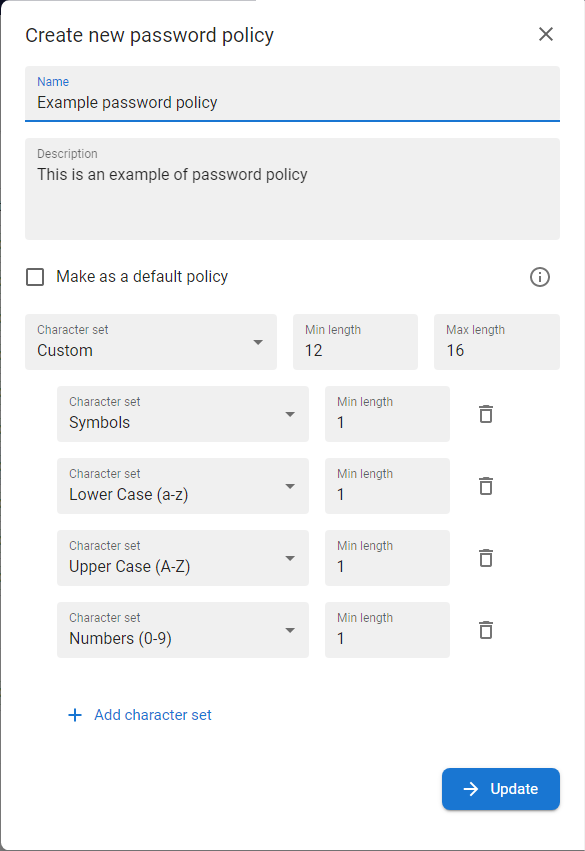
1. Create password policy |
|
1 |
Click on the tab Password policies in ANT PAM settings section |
|
|
2 |
The list of existing Password policies will be displayed.
|
|
|
3 |
Press the CREATE button [ |
|
|
4 |
The modal window with the details of the Password policy will be displayed |
|
|
5 |
Enter the Name (and the Description if needed) |
|
|
6 |
Set Character set = CUSTOM for possibility to define minimal length of all desired subsets |
|
|
7 |
Set Min length = 12 and Max legth = 16 |
|
|
8 |
Choose Lower case, Upper case, Numbers and Symbols as subsets and set Min length = 1. Note: the password must contain at least one char from all subsets and the overall lengths of the password must be at least 12 and maximaly 16 chars. |
|
|
9 |
Press CREATE button and the Password policy will be created and enlisted in the list of password policies. |

2. Create Launcher type Agent RDP |
|
1 |
Click on the tab Launchers in ANT PAM settings section. |
|
|
2 |
The list of existing Launchers will be displayed.
|
|
|
3 |
Press the CREATE button [ |
|
|
4 |
Insert the Name and Description of the launcher and select type Agent RDP and press the button SAVE. |
|
|
5 |
The Launcher is created and displayed in the list of Lauchers. |

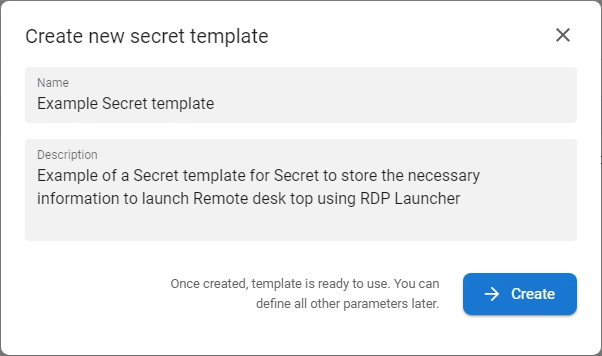
3. Create Secret template |
|
1 |
Click on the tab Secret templates in ANT PAM settings section. |
|
|
2 |
The list of existing Secret templates will be displayed.
|
|
|
3 |
Press the CREATE button [ |
|
|
4 |
The modal window with the details of the Secret template will be displayed. |
|
|
5 |
Fill name and description (optionaly) and press button CREATE. |
|
|
6 |
The Secret template is created and now it is time to create secret template fields |
|
7 |
Go to the Fields tab and press the CREATE NEW FIELD button. |
|
|
8 |
The modal window with the details of Secret template Field will be displayed (press |
|
|
9 |
Create first field - insert: Field Username:
Note: First field is Username, it is just plain text format, this field is mandatory and all history of changes in the Secret should be kept. Field will be edited by user with relevant permissions |
|
|
10 |
Press CREATE button and the field will be saved and displayed in the list of fields. |
|
|
11 |
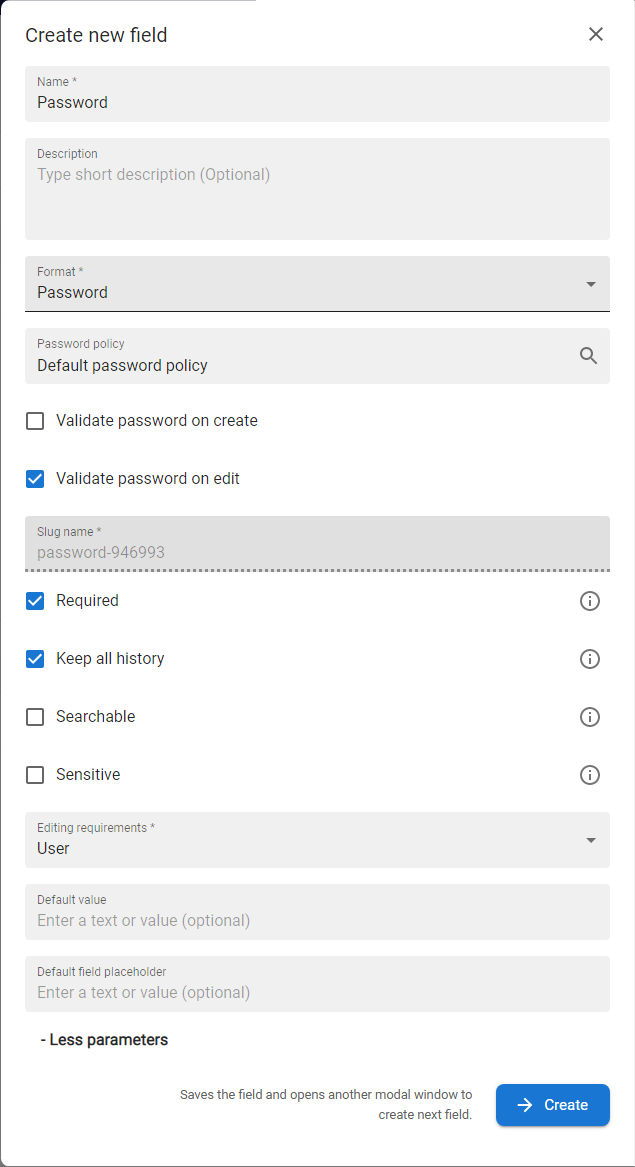
Now it is time to define other fields - press button [ Field Password:
Note: this field will be used to store password. For all field in Password format is Password policy mandatory field, so the new password policy is selected. Validation is set like to edit because the basic assumption is that a username and password already exists for the RDP and does not necessarily meet the conditions set by the new password policy. Each time the password is changed again, the password will then be validated against the password policy. This field is also required and all history should be stored. |
|
|
12 |
Press CREATE button and the field will be saved and displayed in the list of fields. |
|
|
13 |
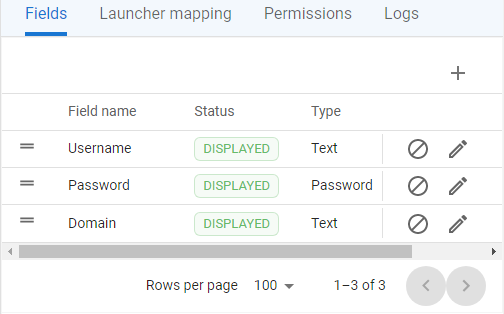
Now create last fields and save it: Field Domain:
Note: unmentioned parameters could be kept unchanged. |
|
|
14 |
All fields are now ready to be used within the Secret creation |
|


4. Create Launcher mapping |
|
1 |
Go to the Launcher mapping tab in the drawer and press the ADD NEW LAUNCHER MAPPING button (or create button [ |
|
|
2 |
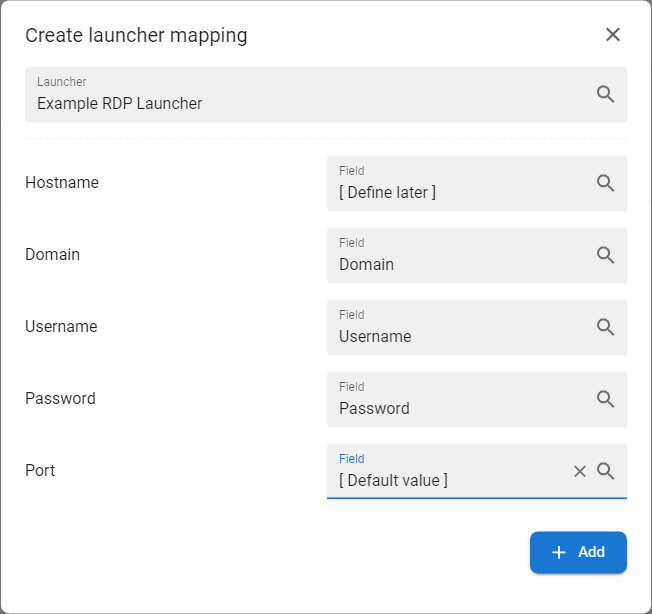
The modal window with the mapping details will be displayed. |
|
|
|
Select Launcher Example RDP Launcher |
|
|
|
The list of Launcher variables are displayed and the select boxes with the Secret template fields to map. Set for:
|
|
|
|
Press the ADD button to save the mapping. |

5. Create Secret |
|
1 |
Go to the tab Secrets to display the Secrets section. |
|
|
2 |
Choose the folder where new Secret should be created and placed and press the button CREATE [ |
|
|
3 |
The modal window for the Secret creation will be displayed. |
|
|
4 |
Fill the Name of the new secret, optionaly Description |
|
|
5 |
Choose the secret template Example Secret template and fill secret template fields:
|
|
|
6 |
Set permissions as inherited. |
|
|
7 |
Press button CREATE to save new secret. |

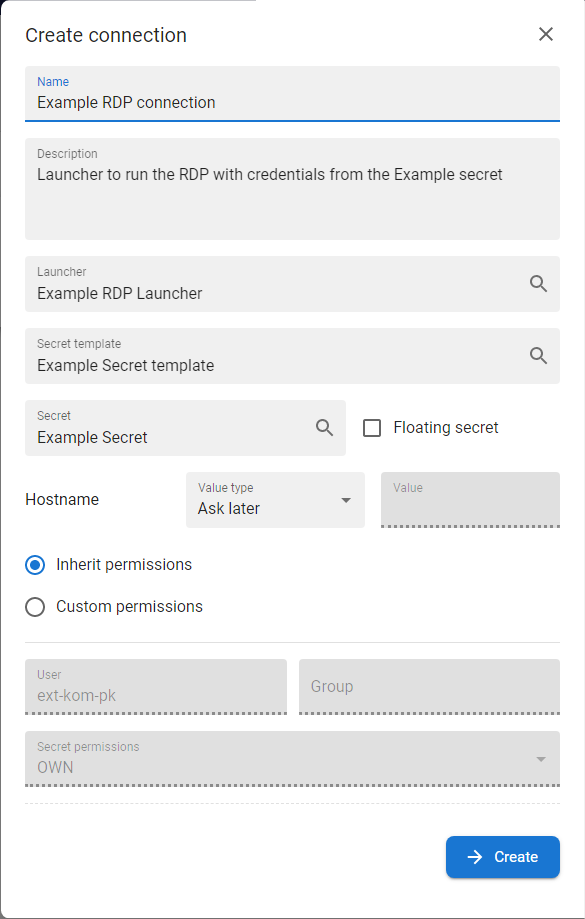
6. Create Connection |
|
1 |
Go to the tab Connections to display the connections section. |
|
|
2 |
Choose the folder where new Connection should be created and placed and press the button CREATE [ |
|
|
3 |
Insert Name of the new secret, optionaly Description. |
|
|
4 |
Select Launcher Example RDP laucher. |
|
|
5 |
Select Secret template Example Secret template. |
|
|
6 |
Select Secret Example Secret. |
|
|
7 |
Set value for Hostname launcher variable as:
|
|
|
8 |
Set permissions as inherited. |
|
|
9 |
Press button CREATE to save new connection. |