Navigation and header
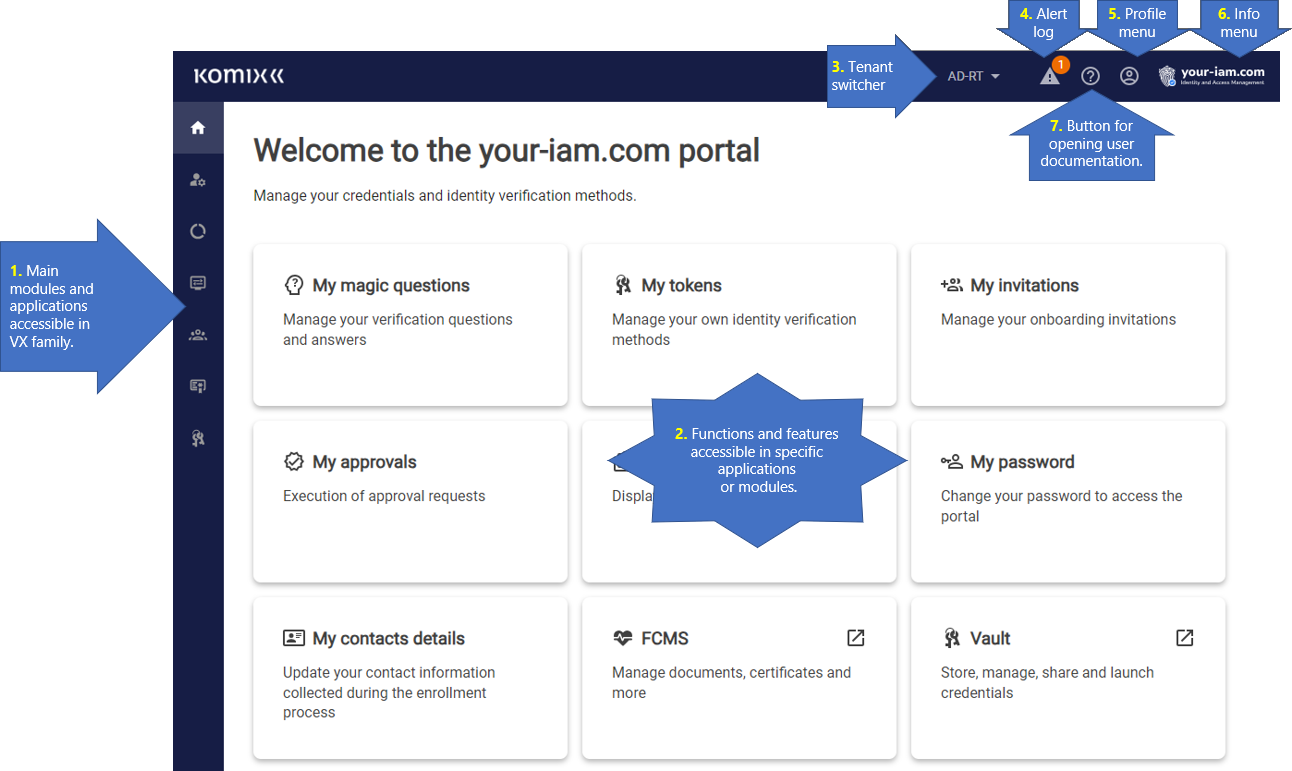
1. Main modules and applications |
Main modules and applications - accessibility of modules depends on the user's privileges
- Dashboard - dashboard with user widgets - configurable
- Selfservice - portal for users
- Statistics - statistical modul for overview of pricing events
- Operational console - console for operators
- IGA - governance - configuration modul for Selfservice and Operational console
- ANT CMAS - application for managing certificates, document signing and so on
- ANT PAM - application for saving password and managing connections.
- TAC - Tenant Admin Console - part of the applications for configuration of tenant related settings
- GAC - Global Admin Console - part of the applications for configuration of global settings
Note: all visible buttons depends on the configurations done for each specific tenant
2. Functions and features |
Functions and features
- Shortcuts to main parts of the ANT ID
Note: all visible buttons depends on the configurations done for each specific tenant
3. Tenant swicher |

Tenant switcher
- feature accessible for users with specific privileges for multiple tenants - mostly for operators or admins.
- switching tenants won't affect the Selfservice modules because these and connected with the home tenant of the user
- swichting tenants will affect the availability of Operational console or IGA Governance console because operator can has access to different tenants.
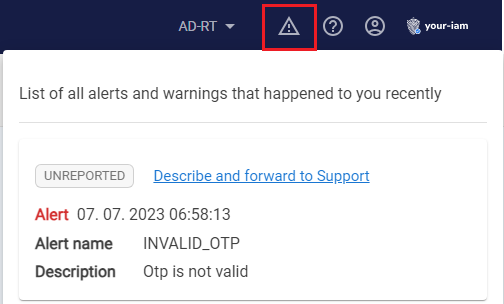
4. Alert log |
Alert log - report a bug feature
- a feature that allows the user, in case of finding a system error, to comment on the error and send it to the appropriate email address, where the error will be addressed by a team of troubleshooters
- the alert log icon appears only if the user encounters a system error.
|
1 |
Click on the Alert log icon and the log will be opened |
|
|
2 |
Choose the relevant error and press button Describe and forward to Support. |
|
|
3 |
New modal window with the details of the message will be opened. |
|
|
4 |
The header of the message is prefilled with the details of the error and can be expanded for more details. |
|
|
5 |
Some more details about wrong behavior could be inserted into Description field. |
|
|
6 |
When the form is completed, press the SEND button. The message will be automatically enhanced by additional information needed for troubleshooting team and send to the relevant email address. The status of the alert will be changed to REPORTED. |
|


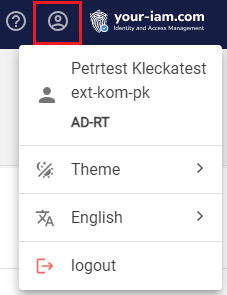
5. Profile menu |
|
Profile menu displays:
|
|
6. Info menu |
|
Info menu displays:
|
|

|
1 |
Click on the Info menu and choose the Submit feedback menu option. |
|
|
2 |
The form for the feedback will be displayed. |
|
|
3 |
Fill mandatory fields and optionally attach the screenshot or other file. |
|
|
4 |
When the form is completed, press the SUBMIT button. The message will be send to the relevant email address. |

7. User documentation |

Well, it's this documentation, obviously :-)