Email Templates
Email templates is a feature that allows users with appropriate permissions (and knowledge) to modify predefined templates and texts of emails that are sent from the application. Email templates work in the following way: each defined action downloads the template layout and content relevant to the action when it needs to communicate with the user. At the beginning, platform templates are prepared for all communication, which are universal and non-editable. In case the user wants to make changes in the template or even in the layout itself - for example, changing the logo, name, text content, etc., it is necessary to make a copy of the corresponding platform template - this will create its tenant specific type in the draft state. This template type can already be edited. After the user makes the appropriate changes - at least basic knowledge of the Freemarker platform is required (https://freemarker.apache.org/index.html), the template can be published. Publishing a tenant specific template will activate it and at the same time deactivate the copied platform template. The active tenant specific template will be used in email communication from now on.
If a situation occurs where it is necessary to revert to the original platform template, the tenant specific template must be removed. This will reactivate the original platform template.
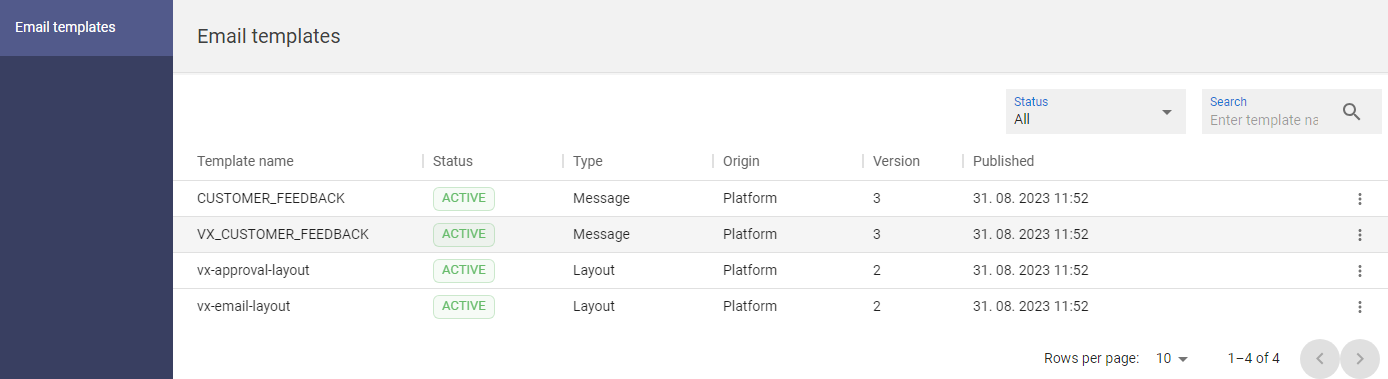
There are two origins of templates in Email templates:
- Platform - a default, preset template that cannot be modified or deleted. It can be cloned.
- Tenant specific - if the platform one is cloned, a tenant template is created (first in draft state), which can be edited according to the needs of the tenant. If the modified tenant template is published, it replaces the platform template and is used as the basis for creating emails. If the tennant template is removed, the system reverts back to the platform template
Furthermore, there are two types of templates:
- message - defines the form and also content of the text in the email.
- layout - defines the layout of the email
Available actions for user with appropriate privileges: |
|
|
Will duplicate template - create new copy of the duplicated template in the DRAFT state. In case of duplicating Platform type of template (or layout) the Tenant specific type will be created. |
|
|
|
Open the editing modal to make any changes on the template. For the platform type of template only view of the detail is possible. |
|
|
|
Open modal window for possibility to test the templates - final test to confirm the layout and text of the template - will send email to configured email address |
|
|
|
Publish templates in DRAFT state - will replace platform template or template with the highest version or relevant template |
|
|
|
Delete the tenant template. After deletion the original platform templates will be activated. This function is not available for platformy type of templates |
|
|
|
Open the new window with the preview of the template - feature accessible from the detail Edit template modal. |


Duplicate the template |
|
1 |
Open the TAC (Tenant admin console) and go to the Email templates option. |
|
|
2 |
Press the DUPLICATE TEMPLATE button [
|
|
|
3 |
The new copy of the template in DRAFT state will be created and the message will be displayed |


Edit the template for modifications |
|
1 |
Open the TAC (Tenant admin console) and go to the Email templates option. |
|
|
2 |
Press the EDIT TEMPLATE button [ |
|
|
3 |
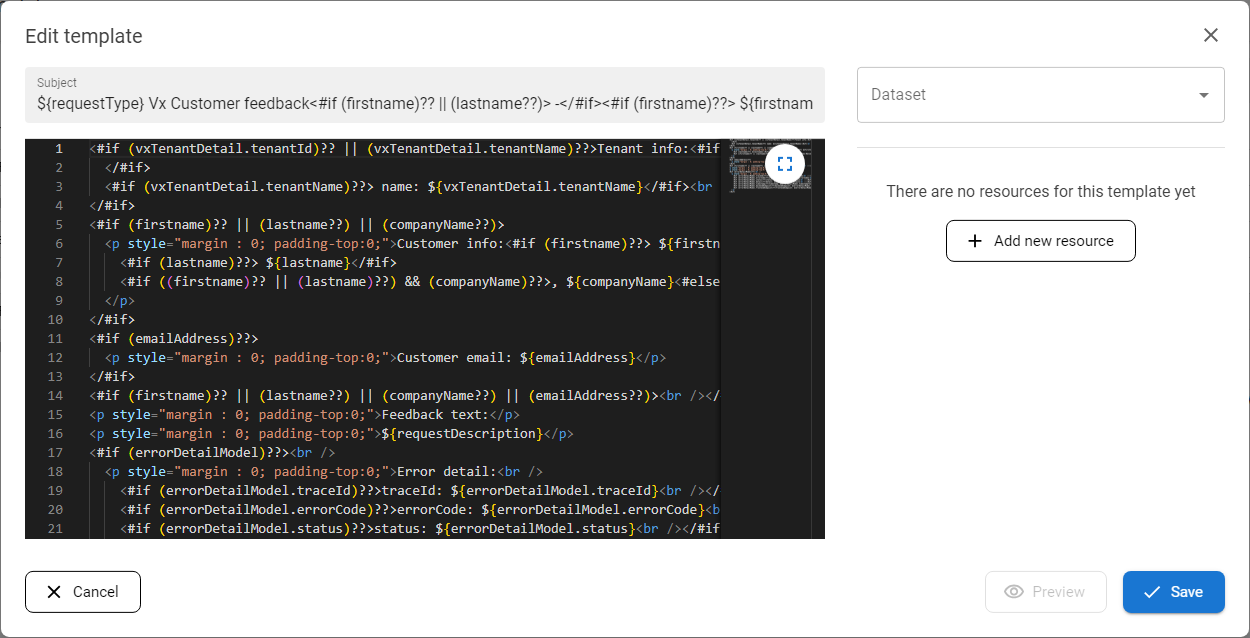
The edit template modal window will be opened. Modal consists of the following parts:
|
|
|
4 |
Only templates in DRAFT mode can be edited - for templates in ACTIVE mode this modal window is read only. |
|
|
5 |
After changes are done, user can use PREVIEW function (see Preview) to visualize the configuration of the template. |
|
|
6 |
If everything is OK, than the configuration of the template can be saved by the SAVE button. |
Test the template |
|
1 |
Open the TAC (Tenant admin console) and go to the Email templates option. |
|
|
2 |
Press the TEST TEMPLATE button [ |
|
|
3 |
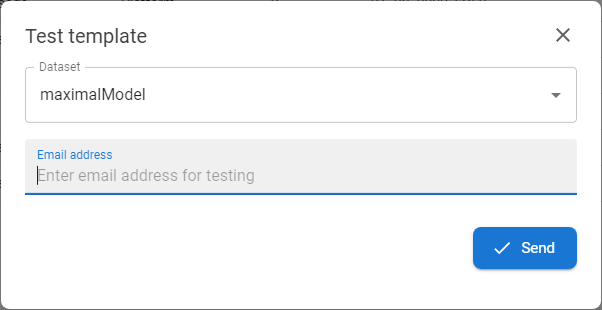
The test modal window will be opened. |
|
|
4 |
Select one of the available datasets and enter the email address to send the test email to. |
|
|
5 |
Press SEND button - the testing email will be sent to the selected email address. |
Publish the template |
|
1 |
Open the TAC (Tenant admin console) and go to the Email templates option. |
|
|
2 |
Press the PUBLISH TEMPLATE button [ |
|
|
3 |
The message about successful publishment will be displayed and status of the published template will be changed to ACTIVE. So from now on this template will be used for the email communication for the relevant action. |

Delete the template |
|
1 |
Open the TAC (Tenant admin console) and go to the Email templates option. |
|
|
2 |
Press the DELETE TEMPLATE button [ |
|
|
3 |
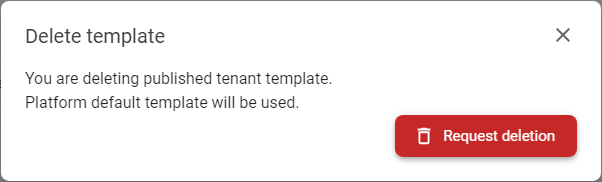
The confirmation modal will be displayed - press REQUEST DELETION button to delete the tenant specific template. |
|
|
4 |
When the tenant specific template is deleted the origin platform template appears in the list and will be used. |
Preview the template |
|
1 |
TAC (Tenant admin console) and go to the Email templates option. |
|
|
2 |
Press the EDIT TEMPLATE button [ |
|
|
3 |
The edit modal will be displayed. |
|
|
4 |
Selec one of available datasets - the Preview button will be activated. |
|
|
5 |
Press PREVIEW button [ |
|
|
6 |
The new window with the details and the content of the template will be displayed. So user can check if every part of the templates is configured correctly. |
|
|
7 |
For the better visualization of the content of the templates use feature Test template (see Test template). |