FIDO2
|
FIDO2 type of token works with multi-factor authentication support provides strong hardware single-factor authentication, 2FA two-factor authentication and Multi-factor authentication. It allows login without the need for a password or even a username using FIDO2 protocols. There are devices that support NFC technology or the token needs to be connected to the device, for example via USB-A/C ports (depending on the manufacturer and the technology used). Tokens can be secured using a specified pin for two-factor authentication, or biometrically - fingerprint - again depending on the manufacturer of the token. |
|
Note: enrollment of the FIDO2 token in not supported by Android operating system.
FIDO2 token complete configuration and enrollment procedure in Windows |
|
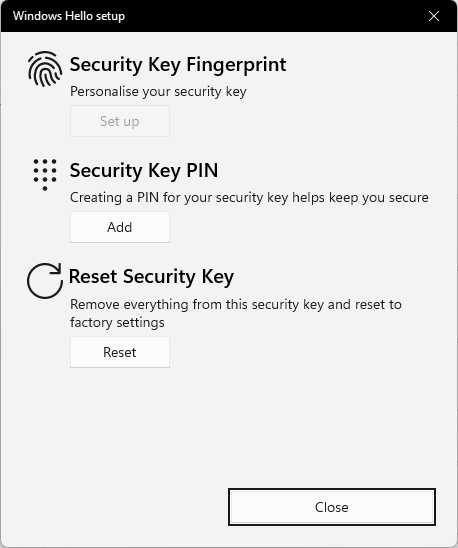
FIDO2 token has to be configured in Windows system for the use in ANT ID first -> PIN and fingerprint (depends on the type of the FIDO2 token).
|
||
|
1 |
Prepare your FIDO2 token and insert it into the USB slot. |
|
|
2 |
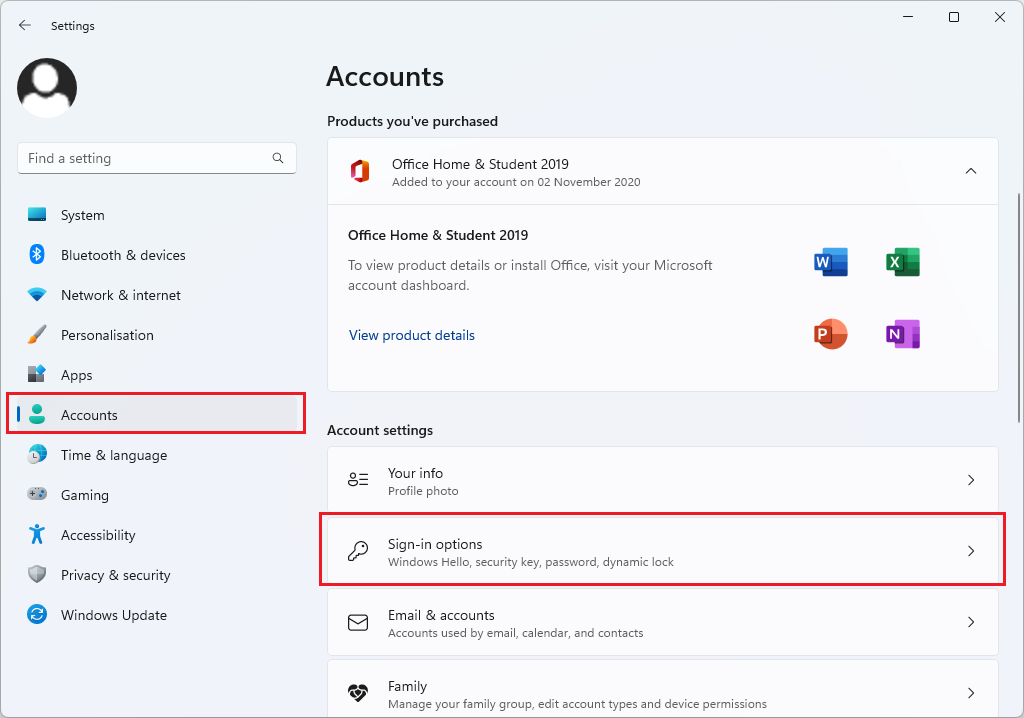
Open Setting in your Windows and go to the Accounts section. Scroll down and find Sign-in options menu item. |
|
|
3 |
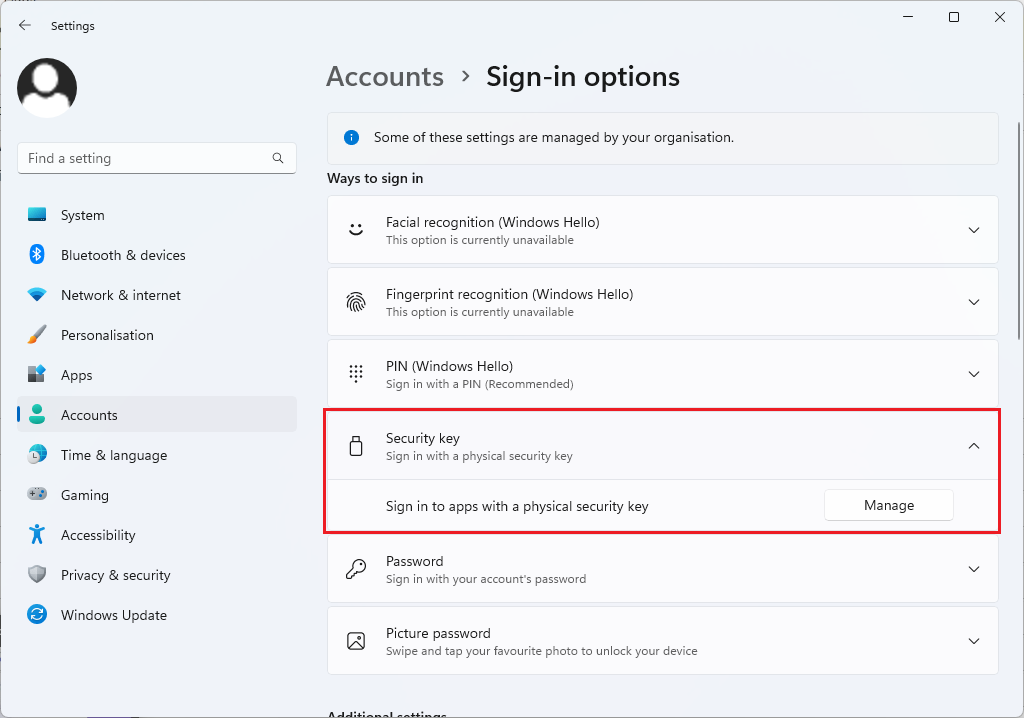
Find the Security key option, expand it and press MANAGE button. |
|
|
4 |
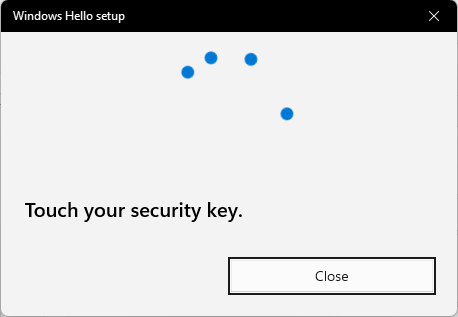
The system will ask user to touch the inserted token |
|
|
5 |
The configuration modal window will be opened |
|
|
6 |
First step is to set up the Security Key PIN for the FIDO2 token - press button ADD. |
|
|
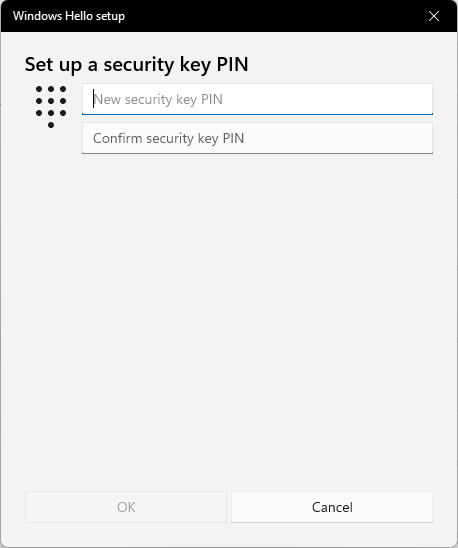
7 |
Insert New security key PIN (twice) and press button OK. |
|
|
8 |
If the FIDO2 is fingerprint type the fingerprints could be registered.
|
|
|
9 |
Press the SET UP button for configuration of the Security key Fingerprint. |
|
|
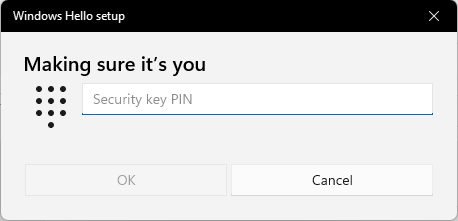
10 |
Insert the newly set Security key PIN and press OK button. |
|
|
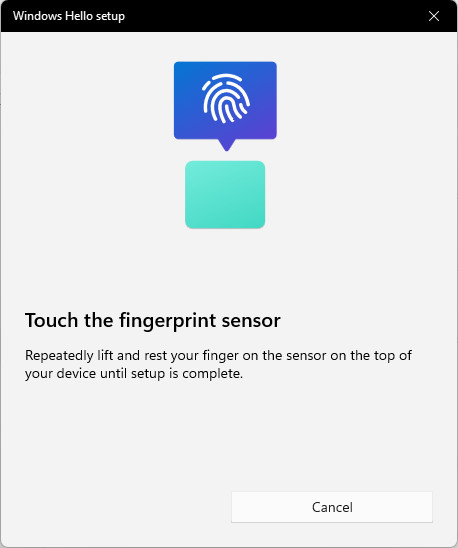
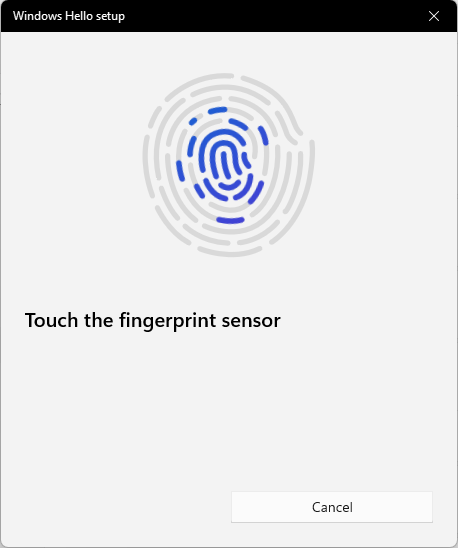
11 |
Touch the fingerprint section of the FIDO2 token wirth your choosen finger to register the fingerprints. |
|
|
12 |
Repeatedly touch the FIDO2 token with the chosen finger till the complete fingerprint is scanned. |
|
|
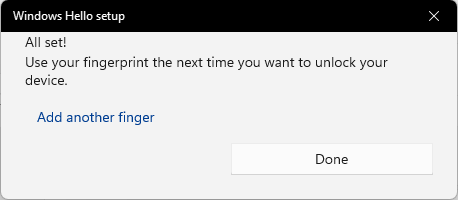
13 |
When the scanning is completed the successful message will be displayed. Then press button DONE.
|
|
|
14 |
The registration of the FIDO2 token for the use within the ANT ID now continue in the ANT ID application in Selfservice - left the token in the USB slot. |
|
|
15 |
Login to Selfservice, go to the ACCOUNTS section - the TOKENS tab is displayed - and press button NEW [ |
|
|
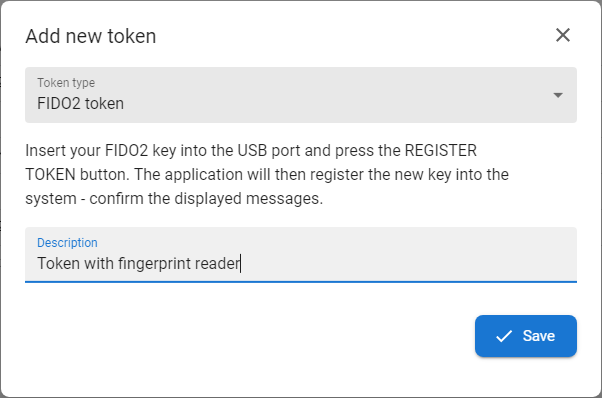
16 |
The form for new token is opened - choose the FIDO2 from the Token type drop down menu, optionaly fill the Description field and press SAVE button.
|
|
|
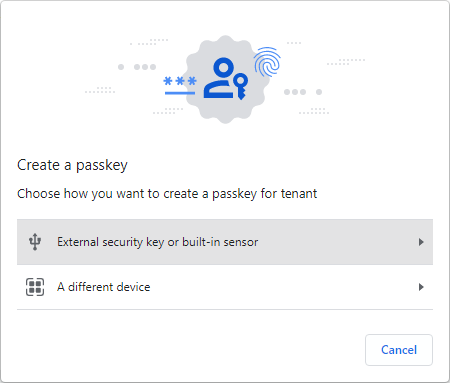
17 |
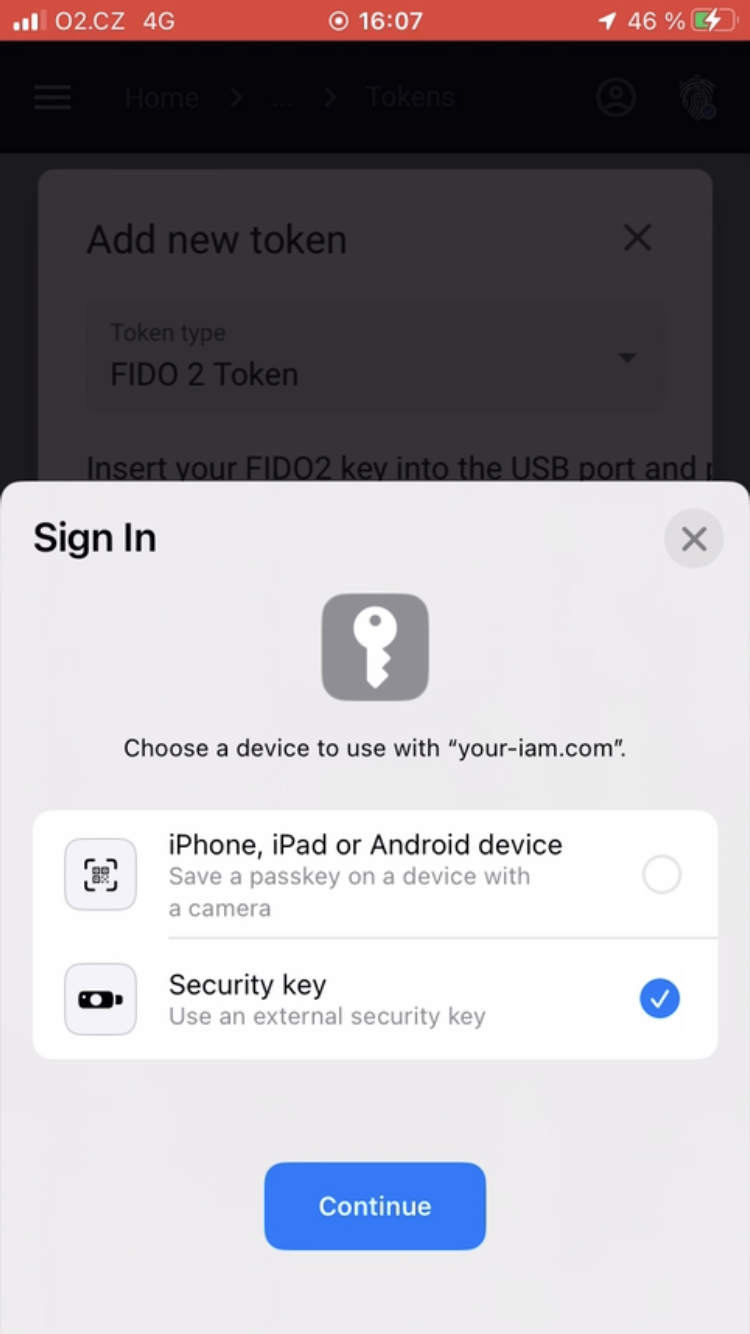
The first registration dialog is opened. Choose the EXTERNAL SECURITY KEY option. |
|
|
18 |
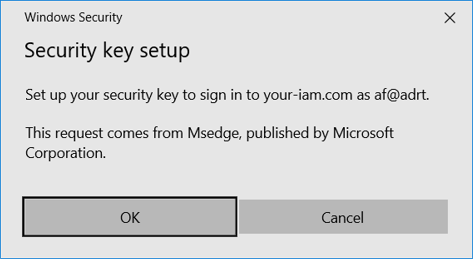
Confirm the request from your browser for the your-iam system - press OK button. |
|
|
19 |
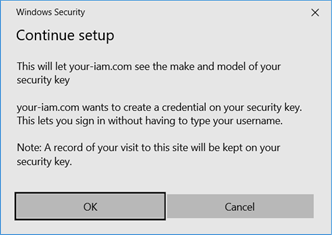
Confirm next step - information about creating new record in the FIDO2 token related to Selfservice - press OK button. |
|
|
20 |
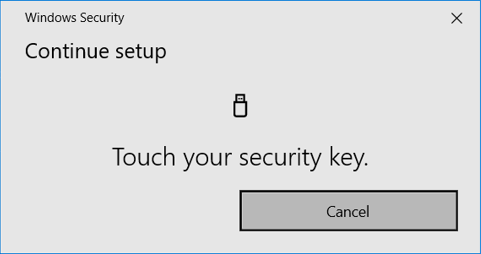
Touch the FIDO2. |
|
|
21 |
If everything is ok, then the message about successful enrollment of the FIDO2 token is displayed and the new token is now available in the list of tokens. Also this token can be used for the login to the ANT ID. |
|


FIDO2 token enrollment process on mobile device - only for NFC type of tokens - for iOS only |
|
1 |
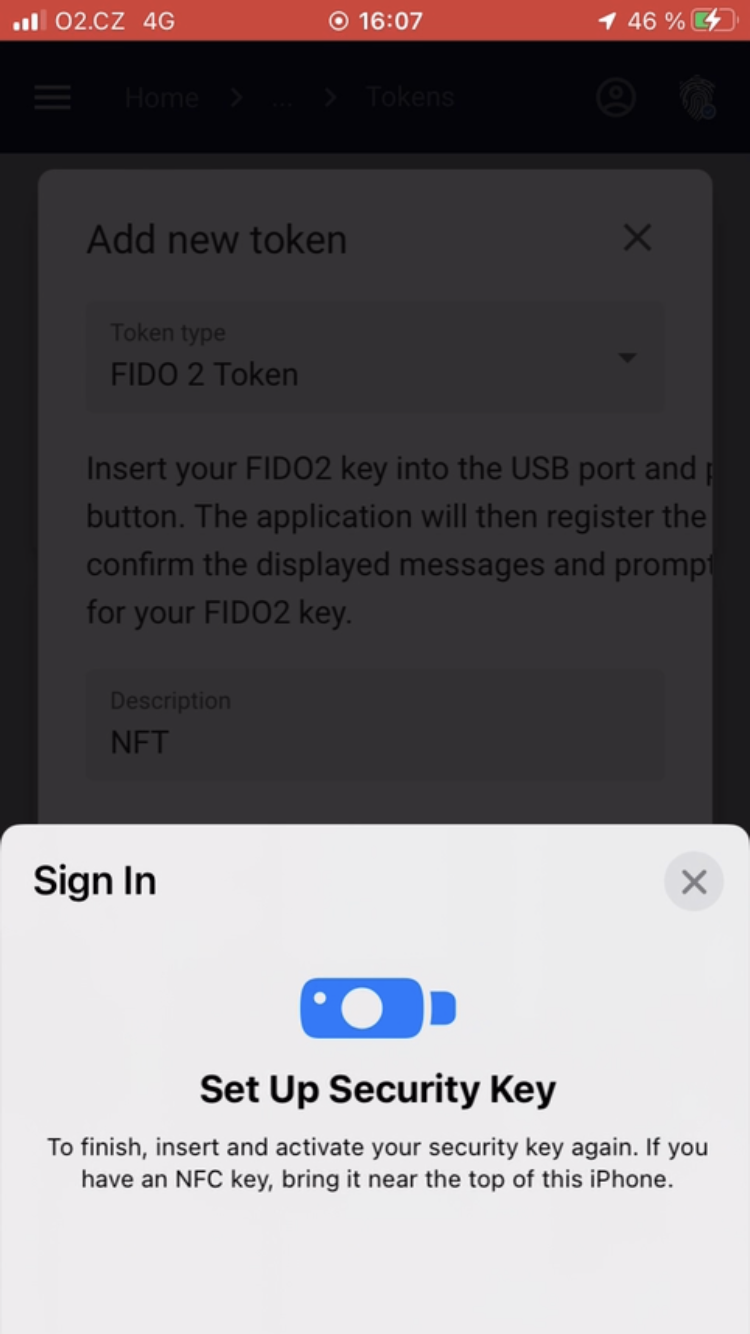
Choose the FIDO2 template from the Token type drop down menu
|
|
|
2 |
Insert the description optionally and press button SAVE. |
|
|
3 |
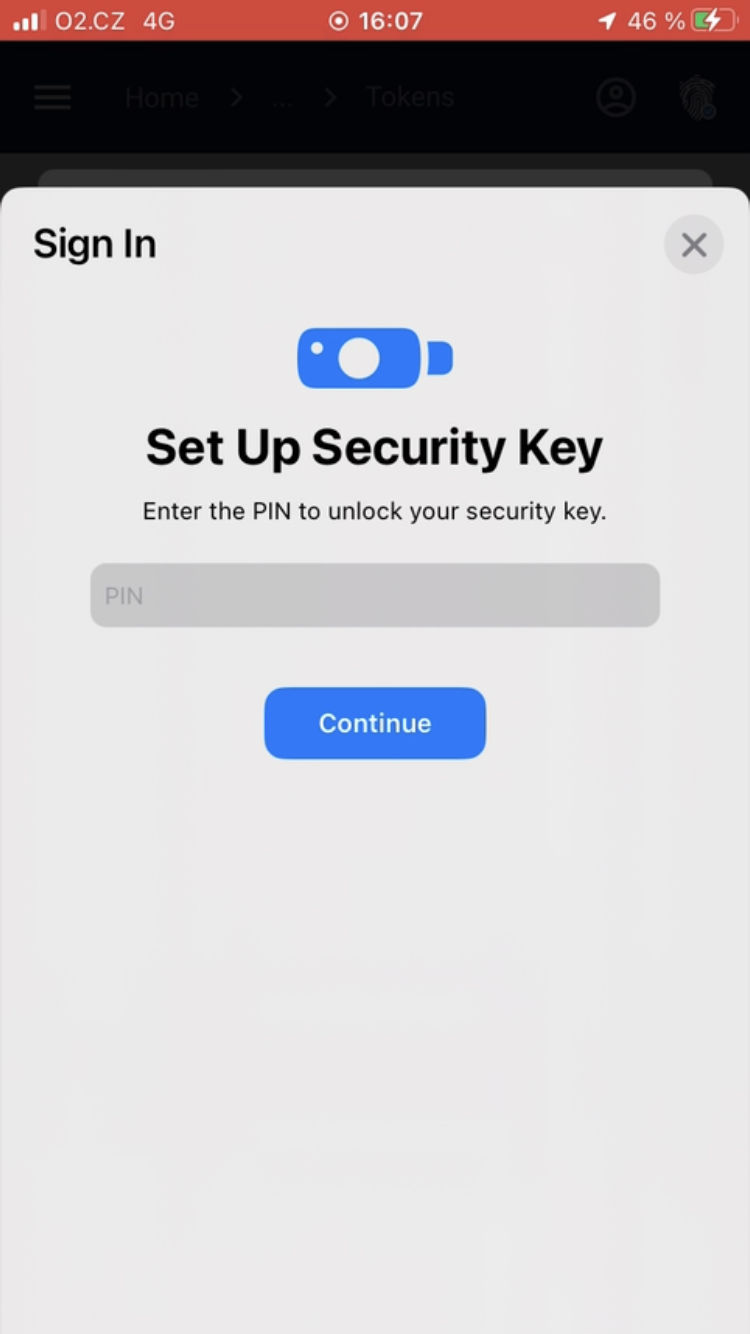
Attach the token to the top of the mobile phone to read the NFC token and follow the instruction of your mobile device:
|
|
|
4 |
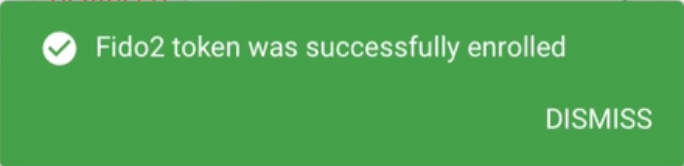
If everything was done correctly then the message about successful enrollment will be displayed and the token is activated. |
|
FIDO2 token test process |
|
1 |
Press the TEST button. |
|
|
2 |
The system connects to your token and asks for authentication - fingerprint reading/pin entry (depending on the token type). |
|
|
3 |
If everything is ok, then the successful message will be displayed. |
|