AAD Profiles

AAD profiles is part of the Hello for business / Azure AD implementation. It allows user with relevant privileges to create (or update) AAD profiles which can be applied to the users in the Operationak console / Hello for business section.
Available actions for user with appropriate privileges: |
|
|
Create new AAD profile. |
|
|
|
Duplicate the profile.
|
|
|
|
Update the profile
|
|
|
|
Define who (specific user or users from specific group) is able to assign affected profile |
|
|
|
Define which groups will be assigned in external resource (Azure) when specific profile will be applied |
|
|
|
Define which groups will be unassigned in external resource (Azure) when specific profile will be applied |
|
|
Delete profile |
|
Delete the profile. |
|
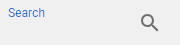
Search profile |
|
Search profiles by name. |
|
Display detail |
[ click on the row ] |
Open the drawer with the detail of the profile |


Creating new AAD profile |
|
1 |
Open the IGA - Governance section and go to the AAD Profiles. |
|
|
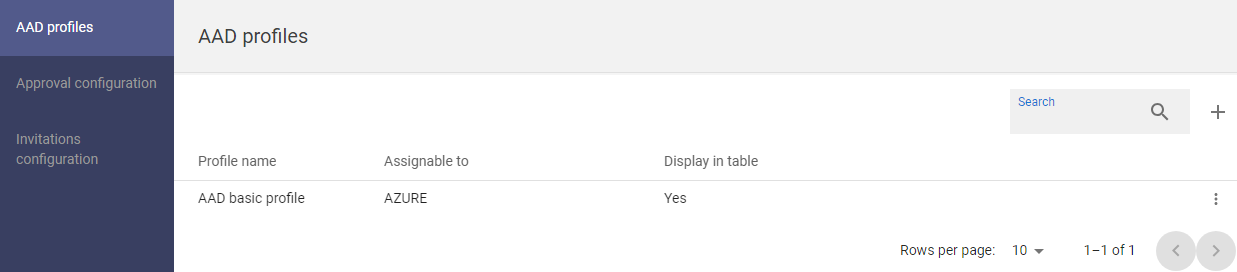
2 |
The list of profiles will be displayed. |
|
|
3 |
Press the CREATE PROFILE button [ |
|
|
4 |
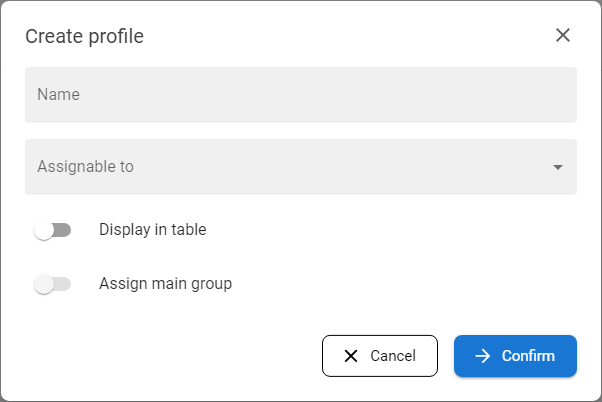
The form for create profile is opened. |
|
|
5 |
Fill in the profile Name and define the types of users for which this profile is applicable. The possibilities are:
Note: in case that USER, ON_PREMISES or GUEST are selected, the DEVICE option is disabled and vice versa if DEVICE is selected than all other options are disabled |
|
|
6 |
Choose the Display in table for the possibility to display the profile assigned on the user in the users list - feature in Operational console. Sometimes the profile should not be displayed on the list. |
|
|
7 |
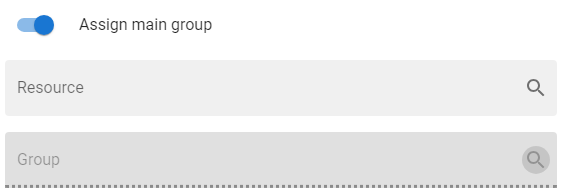
Choose whether the prefered group should be displayed on the user's detail. If the Assign main group is checked, then the Resource selection will be disabled and user can select which group will be set as main group - for identification of the profile. |
|
|
8 |
Set all mandatory fields and press button CONFIRM. The profile will be created and displayed in the list of profiles. |
Configure permissions |
|
1 |
Open the IGA - Governance section and go to the AAD Profiles. |
|
|
2 |
The list of profiles will be displayed. |
|
|
3 |
Select desired profile and mouseclick on the row of the table. The drawer with the detail of the profile will be opened. |
|
|
4 |
Go to tab Permissions and press the CREATE PERMISSIONS button [ |
|
|
5 |
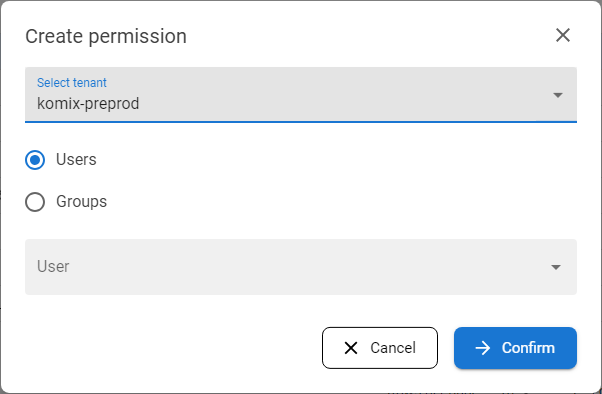
Select the tenant from which users and/or groups will be able to access this profile. |
|
|
6 |
Select if users or groups should be offered in the selection below. |
|
|
7 |
Select user or group of users and press CONFIRM button.
|
|
|
8 |
The new record with the permissions will be displayed in the list of permission. |
Configure groups that will be assigned within profile application |
|
1 |
Open the IGA - Governance section and go to the AAD Profiles. |
|
|
2 |
The list of profiles will be displayed. |
|
|
3 |
Select desired profile and mouseclick on the row of the table. The drawer with the detail of the profile will be opened. |
|
|
4 |
Go to tab Groups to assign and press the CREATE GROUP button [ |
|
|
5 |
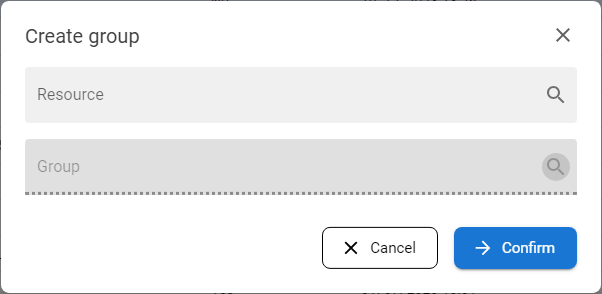
Select the Resource and specific Group and press the CONFIRM button. |
|
|
6 |
The new record with the group will be displayed in the list of groups to assign. When this profile is applied to the user or device, then displayed groups will be assigned within profile application. |
Configure groups that will be unassigned within profile application |
|
1 |
Open the IGA - Governance section and go to the AAD Profiles. |
|
|
2 |
The list of profiles will be displayed. |
|
|
3 |
Select desired profile and mouseclick on the row of the table. The drawer with the detail of the profile will be opened. |
|
|
4 |
Go to tab Groups to unassign and press the CREATE GROUP button [ |
|
|
5 |
Select the Resource and specific Group and press the CONFIRM button. |
|
|
6 |
The new record with the group will be displayed in the list of groups to unassign. When this profile is applied to the user or device, then displayed groups will be unassigned within profile application. |
Duplicate AAD profile |
|
1 |
Open the IGA - Governance section and go to the AAD Profiles. |
|
|
2 |
The list of AAD profiles will be displayed. |
|
|
3 |
Choose the profile and press the DUPLICATE [ |
|
|
4 |
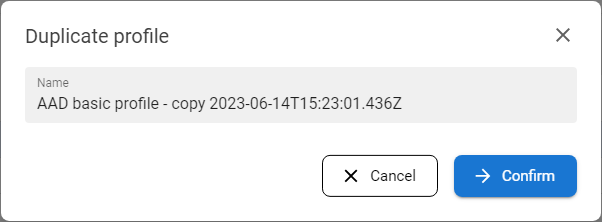
The confirmation modal with the new name will be opened - adjust or just confirm the modal and copy of the profile will be created. |
|

Edit AAD profile |
|
1 |
Open the IGA - Governance section and go to the AAD Profiles. |
|
|
2 |
The list of AAD profiles will be displayed. |
|
|
3 |
Choose the profile and press the EDIT [ |
|
|
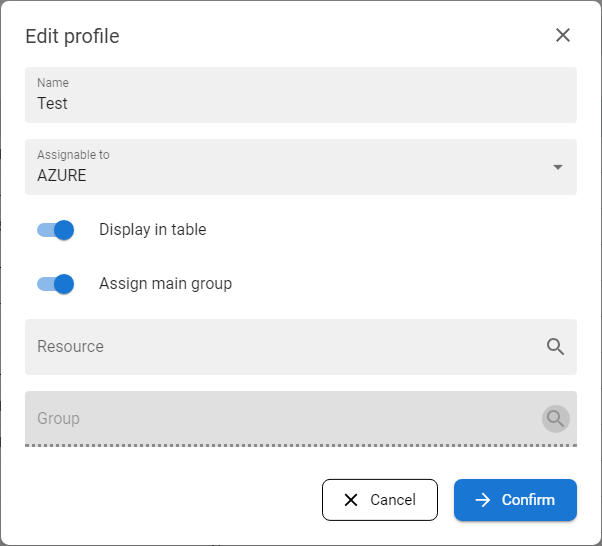
4 |
The edit modal window will be opened to possibly edit all parameters of the profile. |
|
|
5 |
Adjust parameters of the profile and press button CONFIRM - the changes will be submitted.
|